Lesson 4 · Documents, CAD and check-in/out
PLM documents, the check-out lock, the PLM 3D viewer, the CAD Viewer and setting up the CAD client.
Goal of this lessonTo manage a part's documents, edit them safely with check-out/check-in and look at CAD data in the browser.
What a document is
A PLM document is any file linked to a part: a 3D model (STEP), a drawing (DXF, PDF), an exchange file such as IGES. A document has its own code, revision and state and moves with its part: releasing the part releases its documents, a new revision revises them too.
Step by step
Find the documents
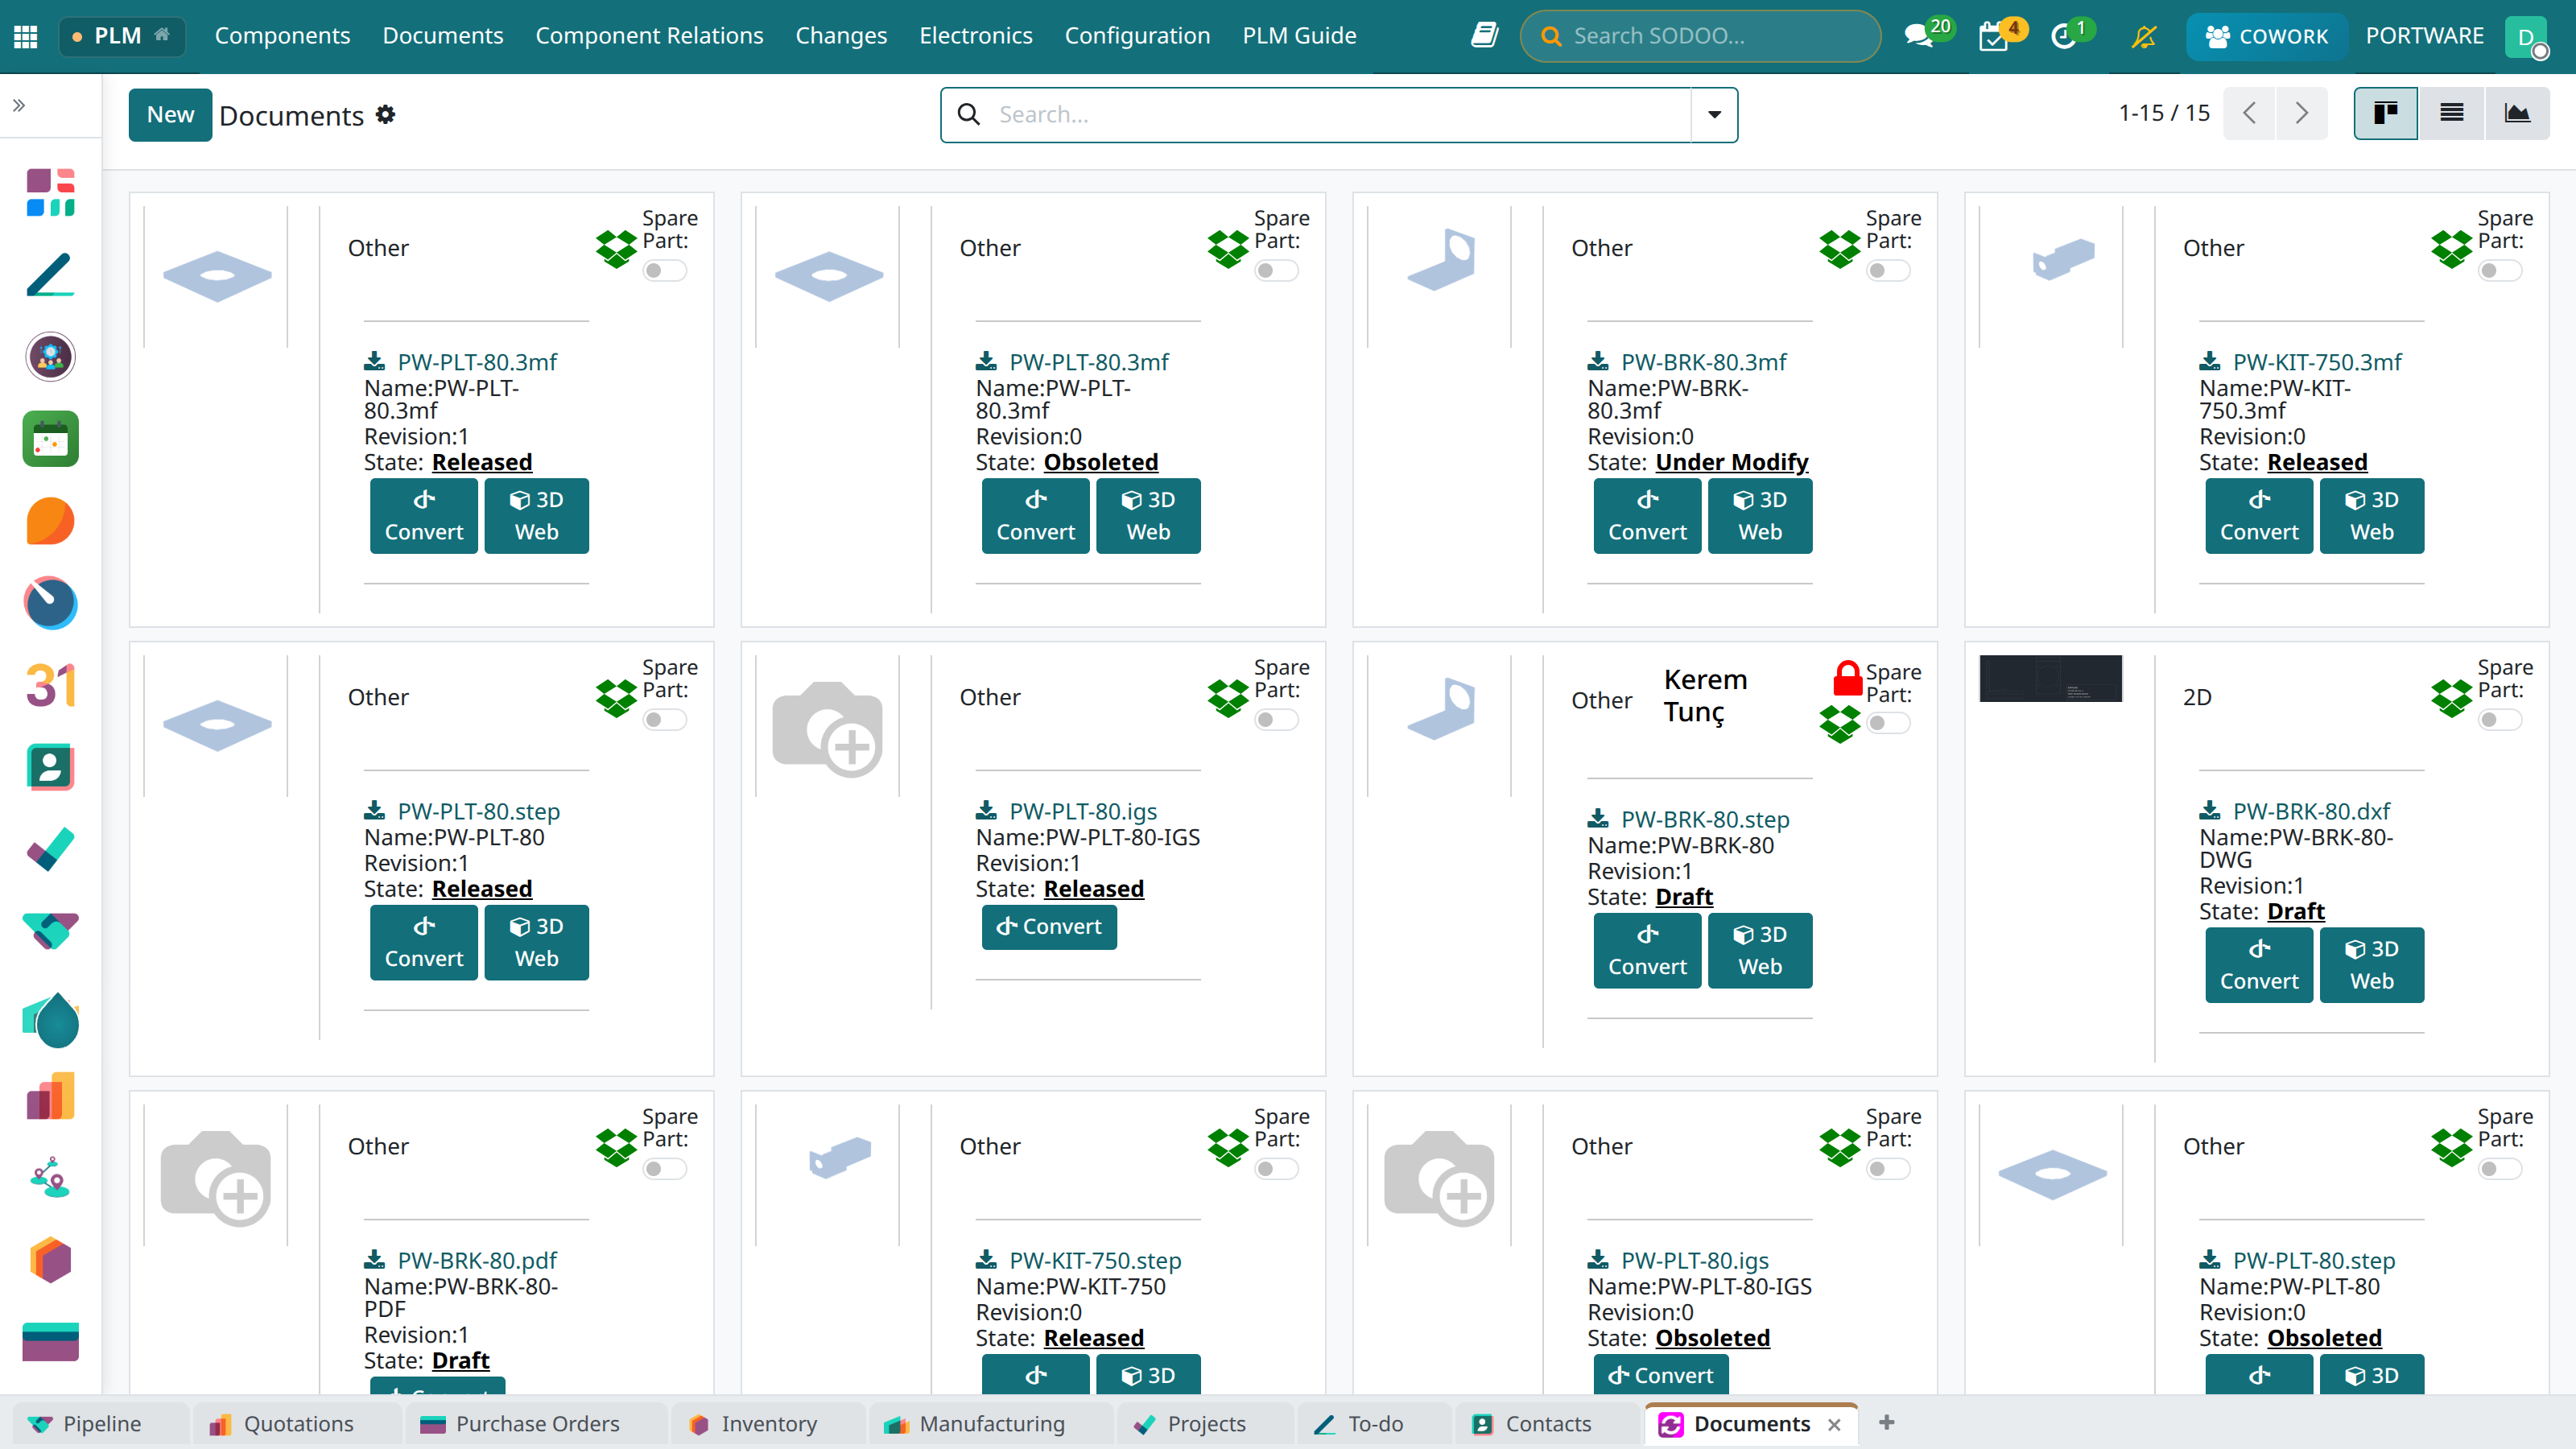
The Documents menu opens as cards. Remove the default filter to see every document; a lock and a person's name say who has the document checked out.
 1234
1234- A document checked out by Kerem Tunç (lock icon).
- Convert: converts the file on the server.
- 3D Web: opens it in the PLM 3D viewer.
- View switcher: cards, list, graph.
Read the document form
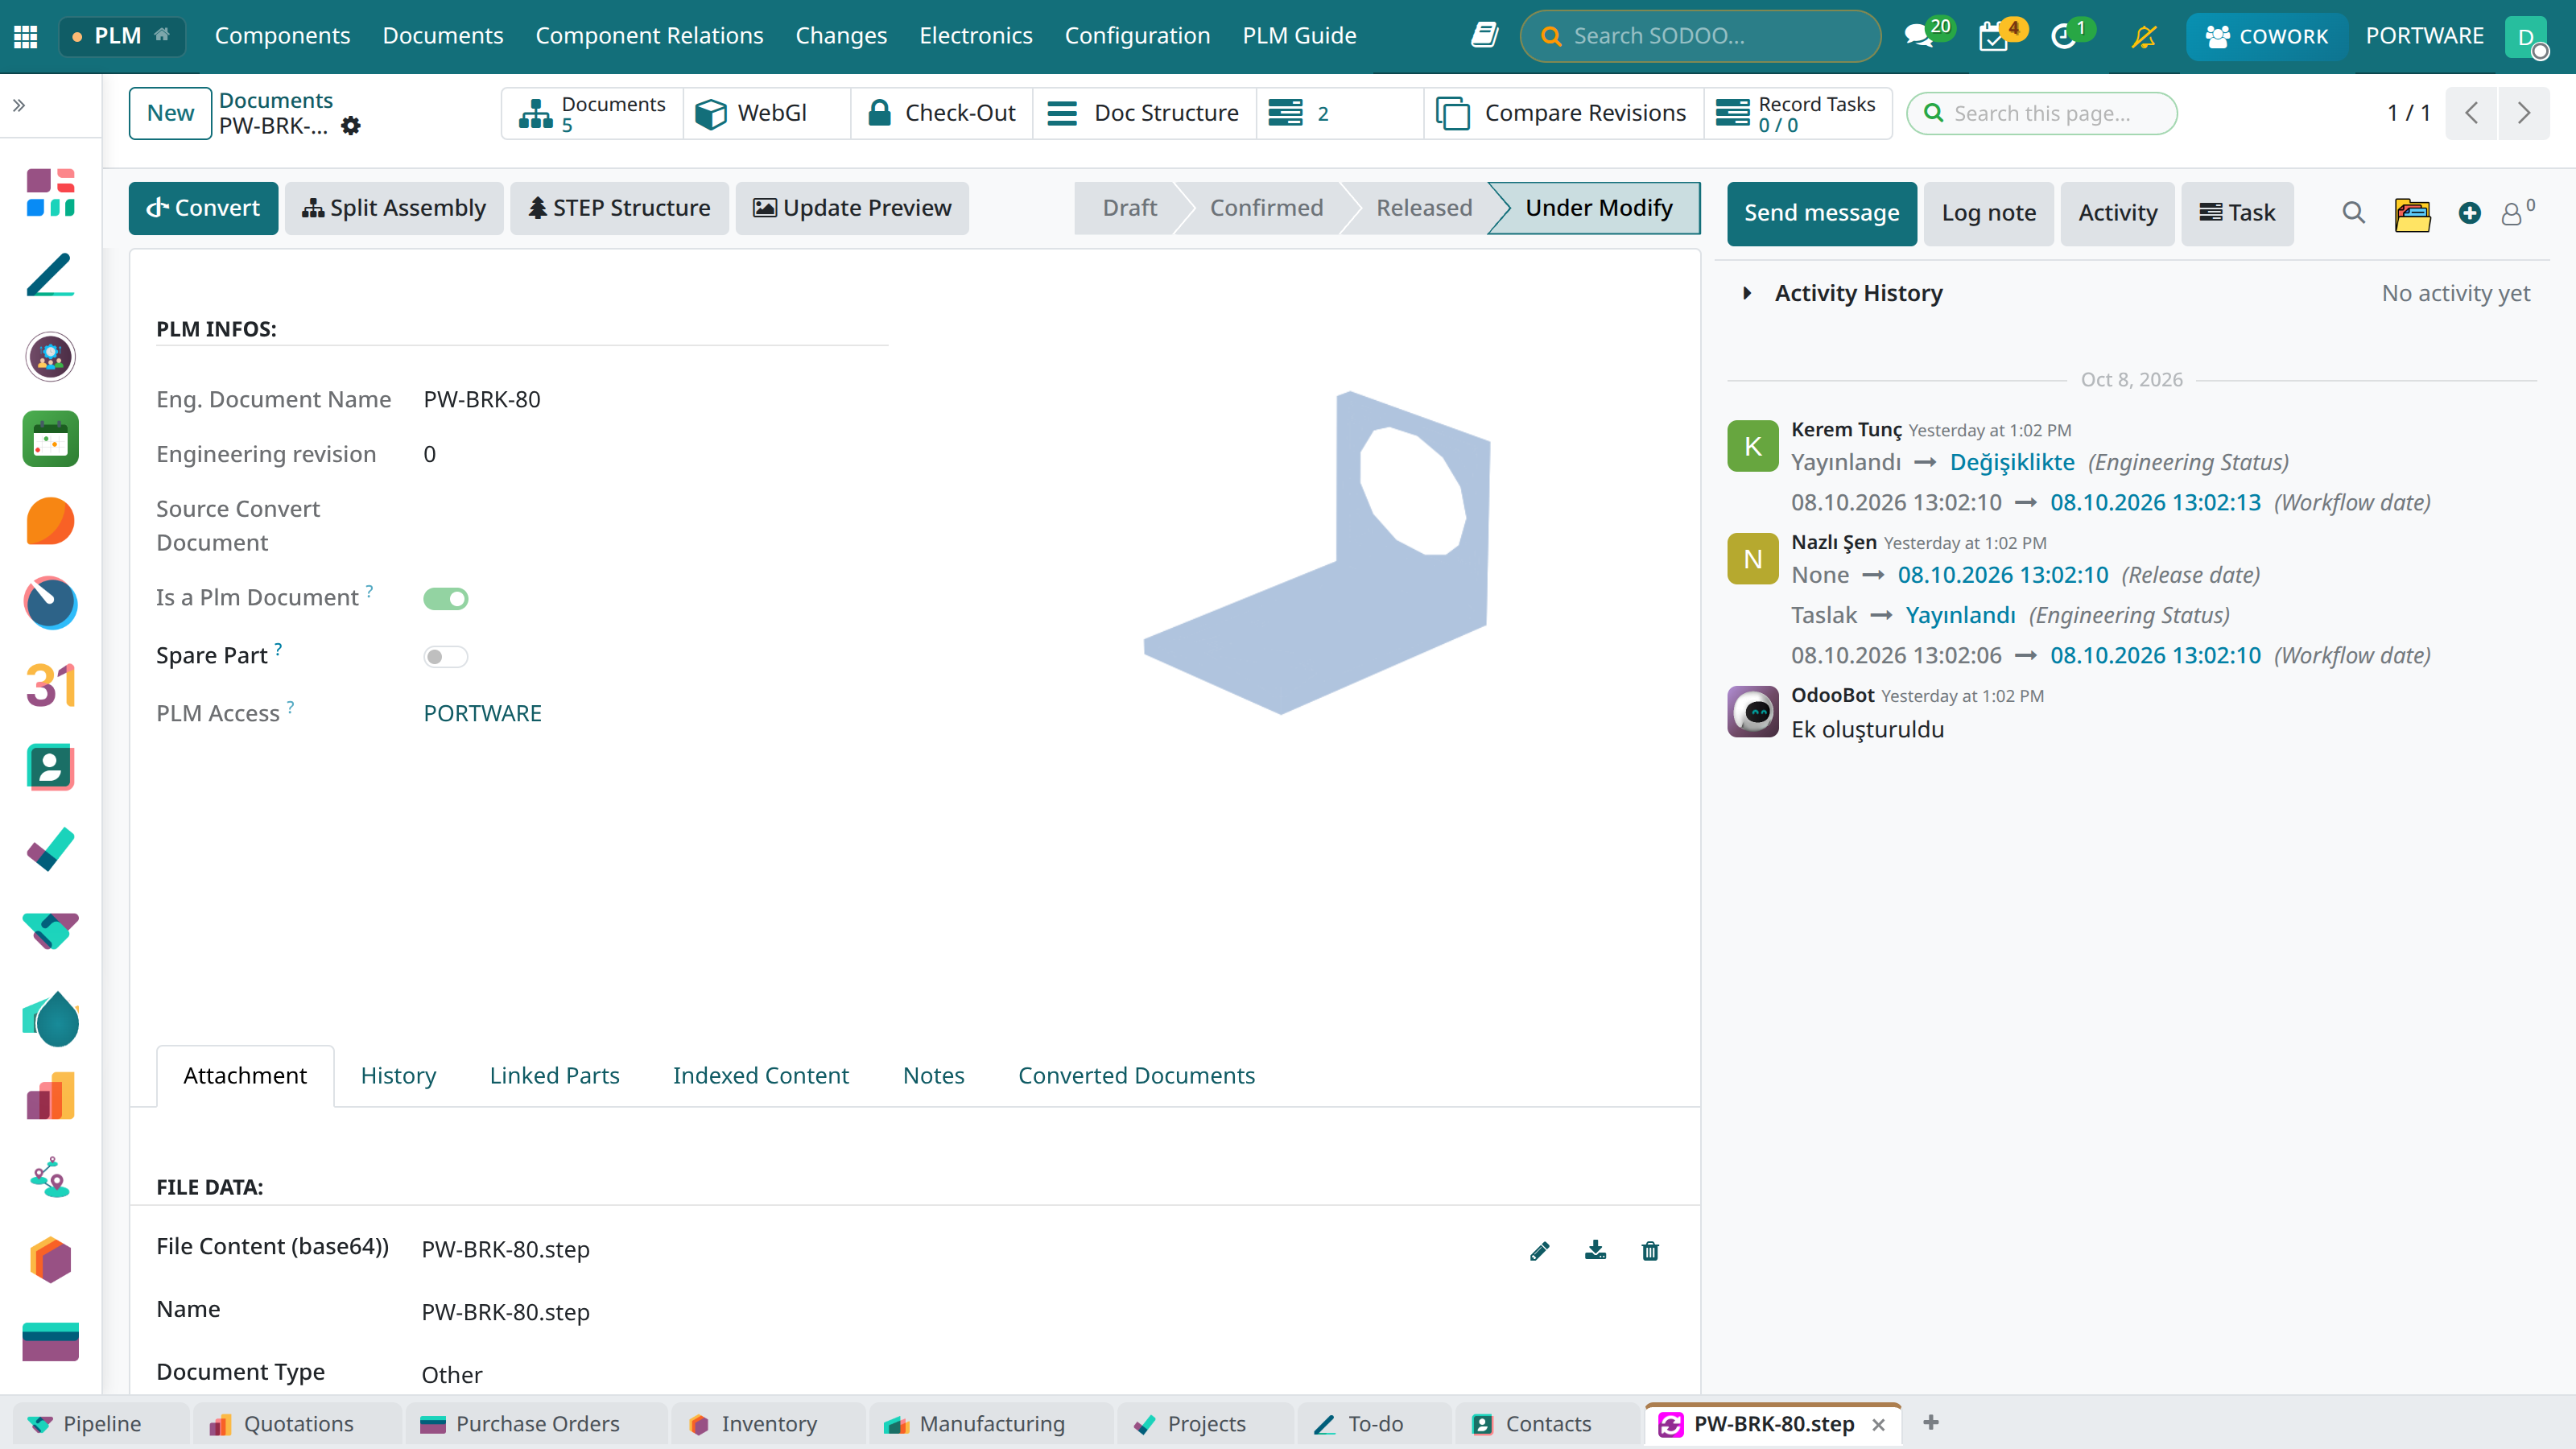
The form shows the preview, the document's structure, its revisions and its linked parts. The document's state follows its part's.
 123456
- Preview: made on the server from the STEP model.
- WebGl: the PLM 3D viewer.
- Check-Out: who has the document.
- Doc Structure: assembly–child and drawing–model relations.
- State: follows the part (here Under Modify).
- Linked Parts: the parts the document belongs to.
Watch the check-out list
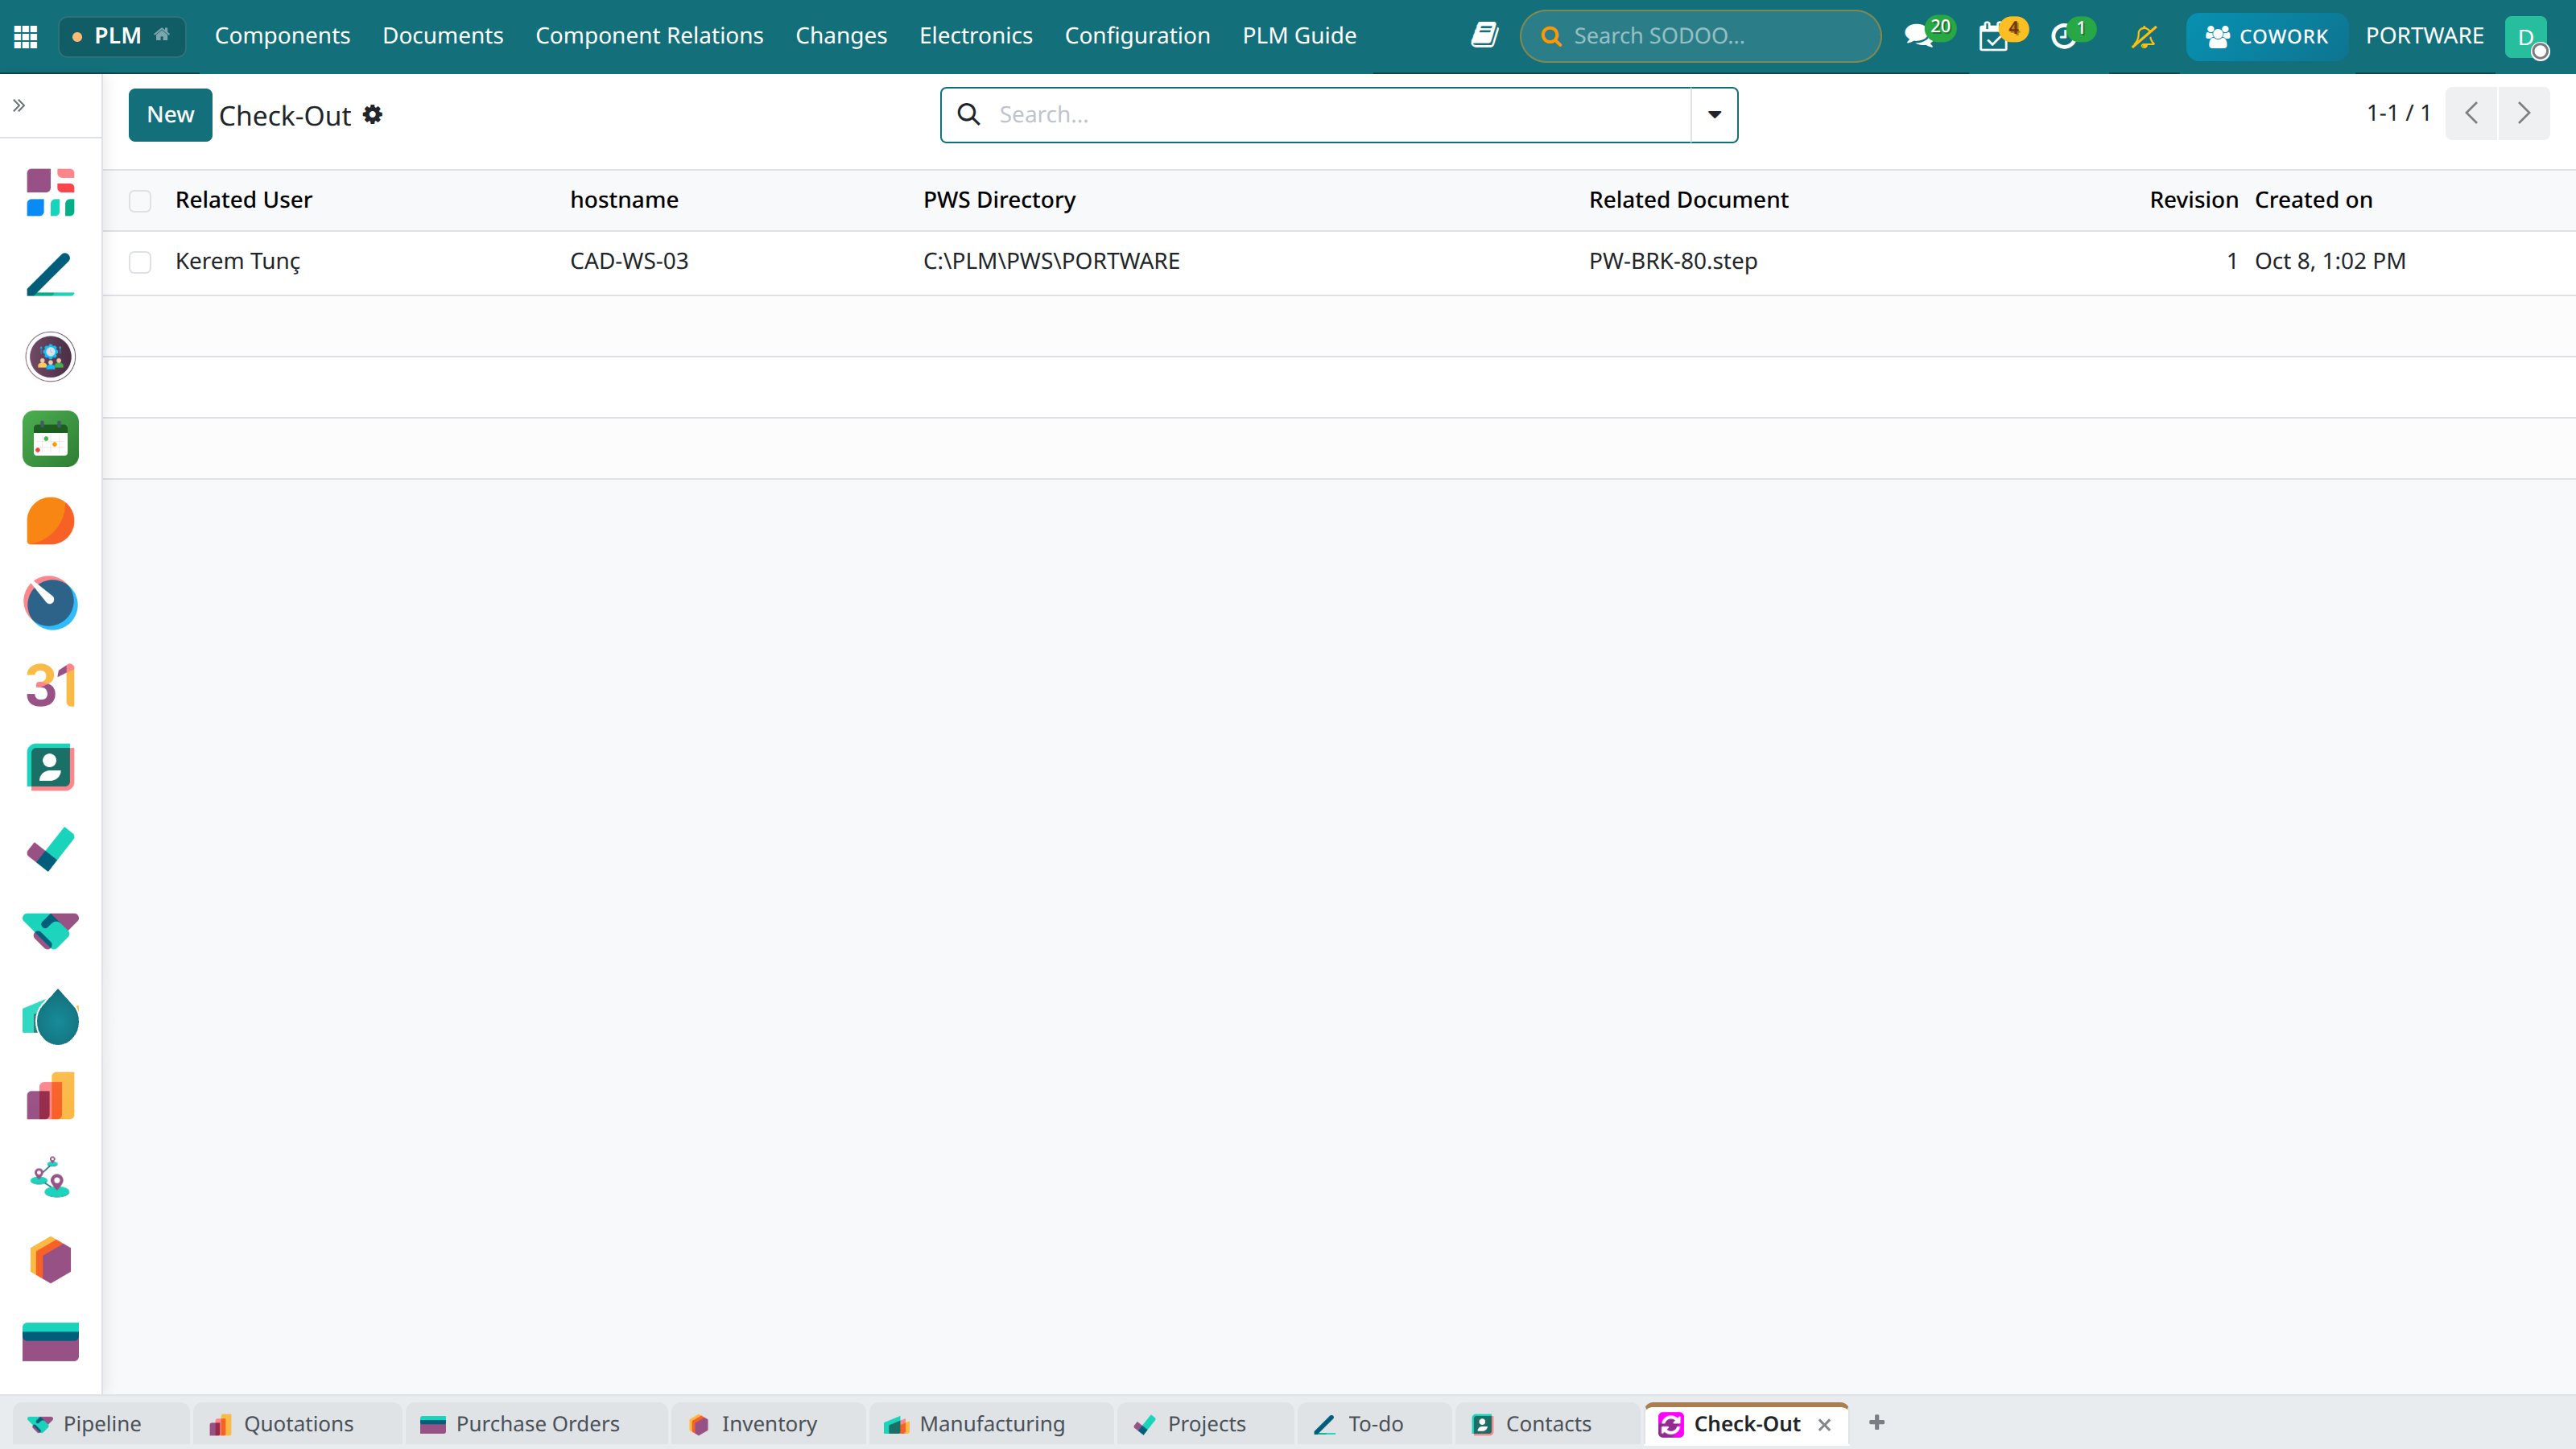
Documents › Search on Checked-Out Documents shows which document is with whom and on which computer. A check-out is a lock: nobody else can write over the document, and it cannot be released until it is checked in.
 123
123- The user holding the document.
- The computer's name (CAD workstation).
- The locked document.
Inspect the model in the PLM 3D viewer
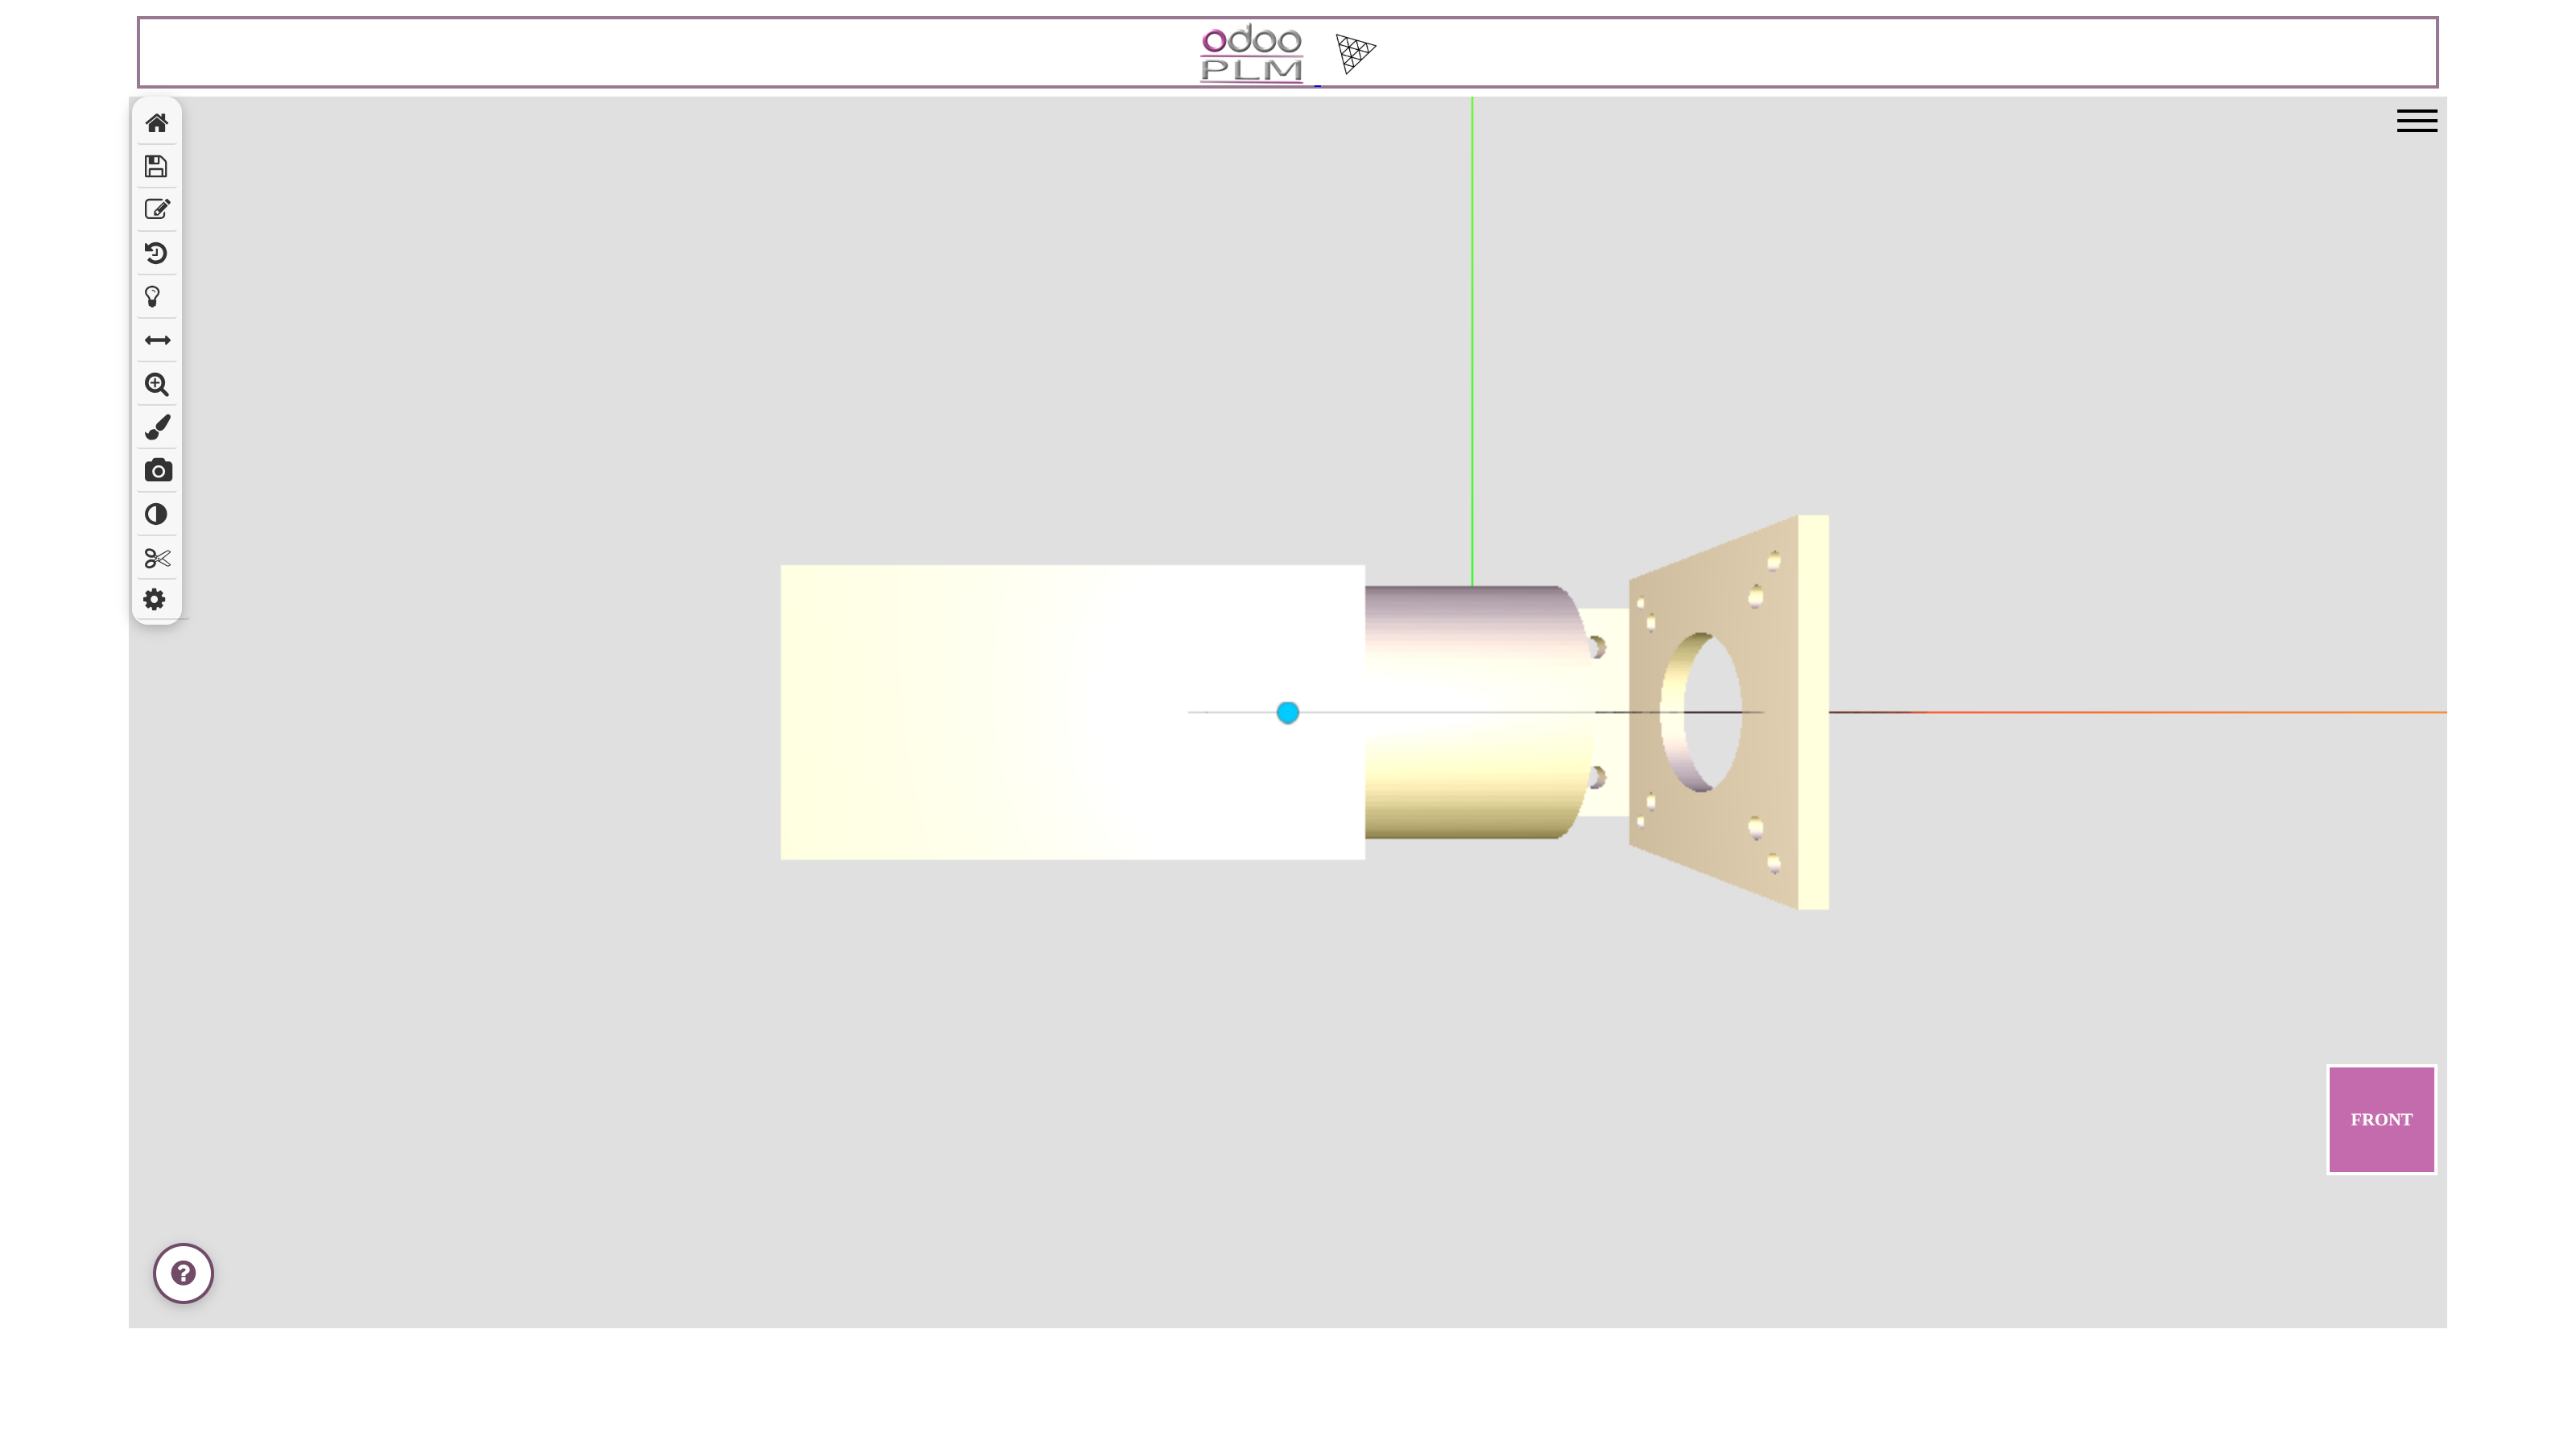
STEP and DXF documents open in PLM's own 3D viewer: assembly tree, markup, measurement and section plane. Markups are saved on the document as activities.
 1234
1234- Toolbar: fit view, screenshot, markup, measure, section, settings.
- Markup: draw on the model and leave a note.
- Measure.
- Section Plane.
The CAD Viewer for IGES, BREP, DWG
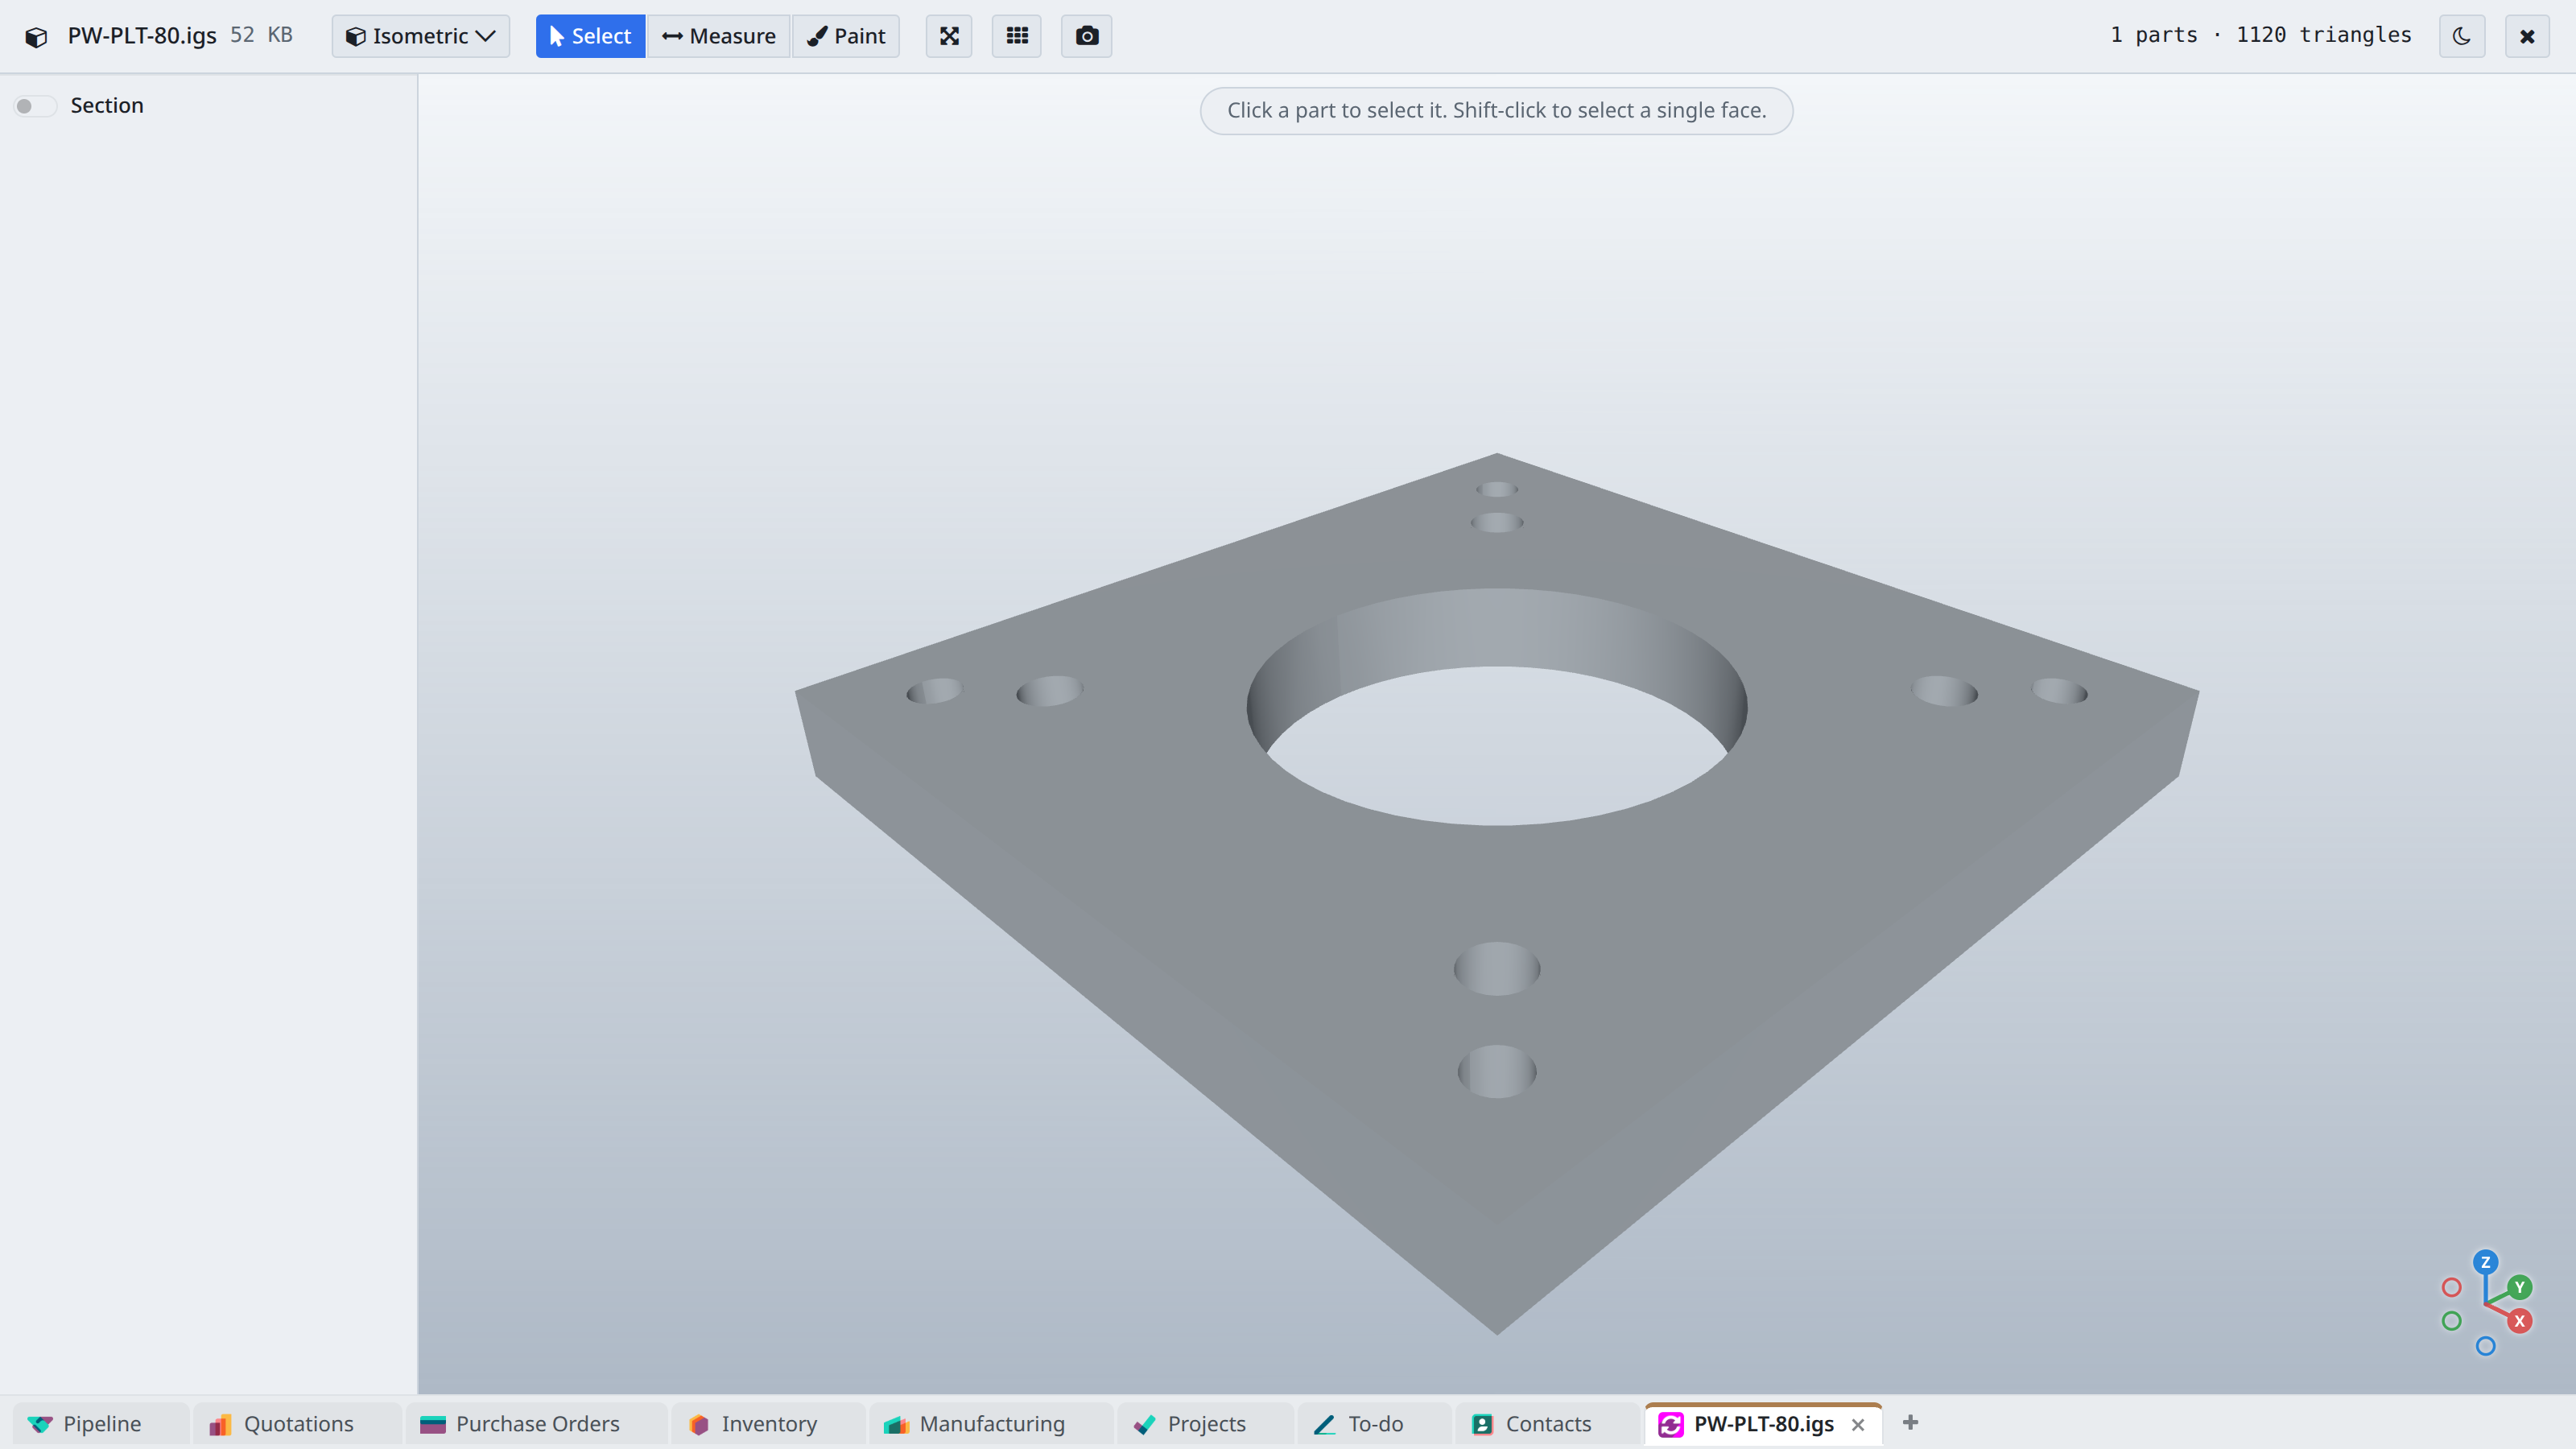
Where PLM's 3D viewer cannot open the format (IGES, BREP, PLY, DWG; an explanation for X_T and SAT) the document form shows a CAD Viewer button: rotate, section, measure, explode and colour in the browser.
 1234
1234- File name and size.
- Measure: distance between points, edges or faces.
- Section: switch it on, pick the axis and position.
- Number of parts and triangles.
Compare two revisions in 3D
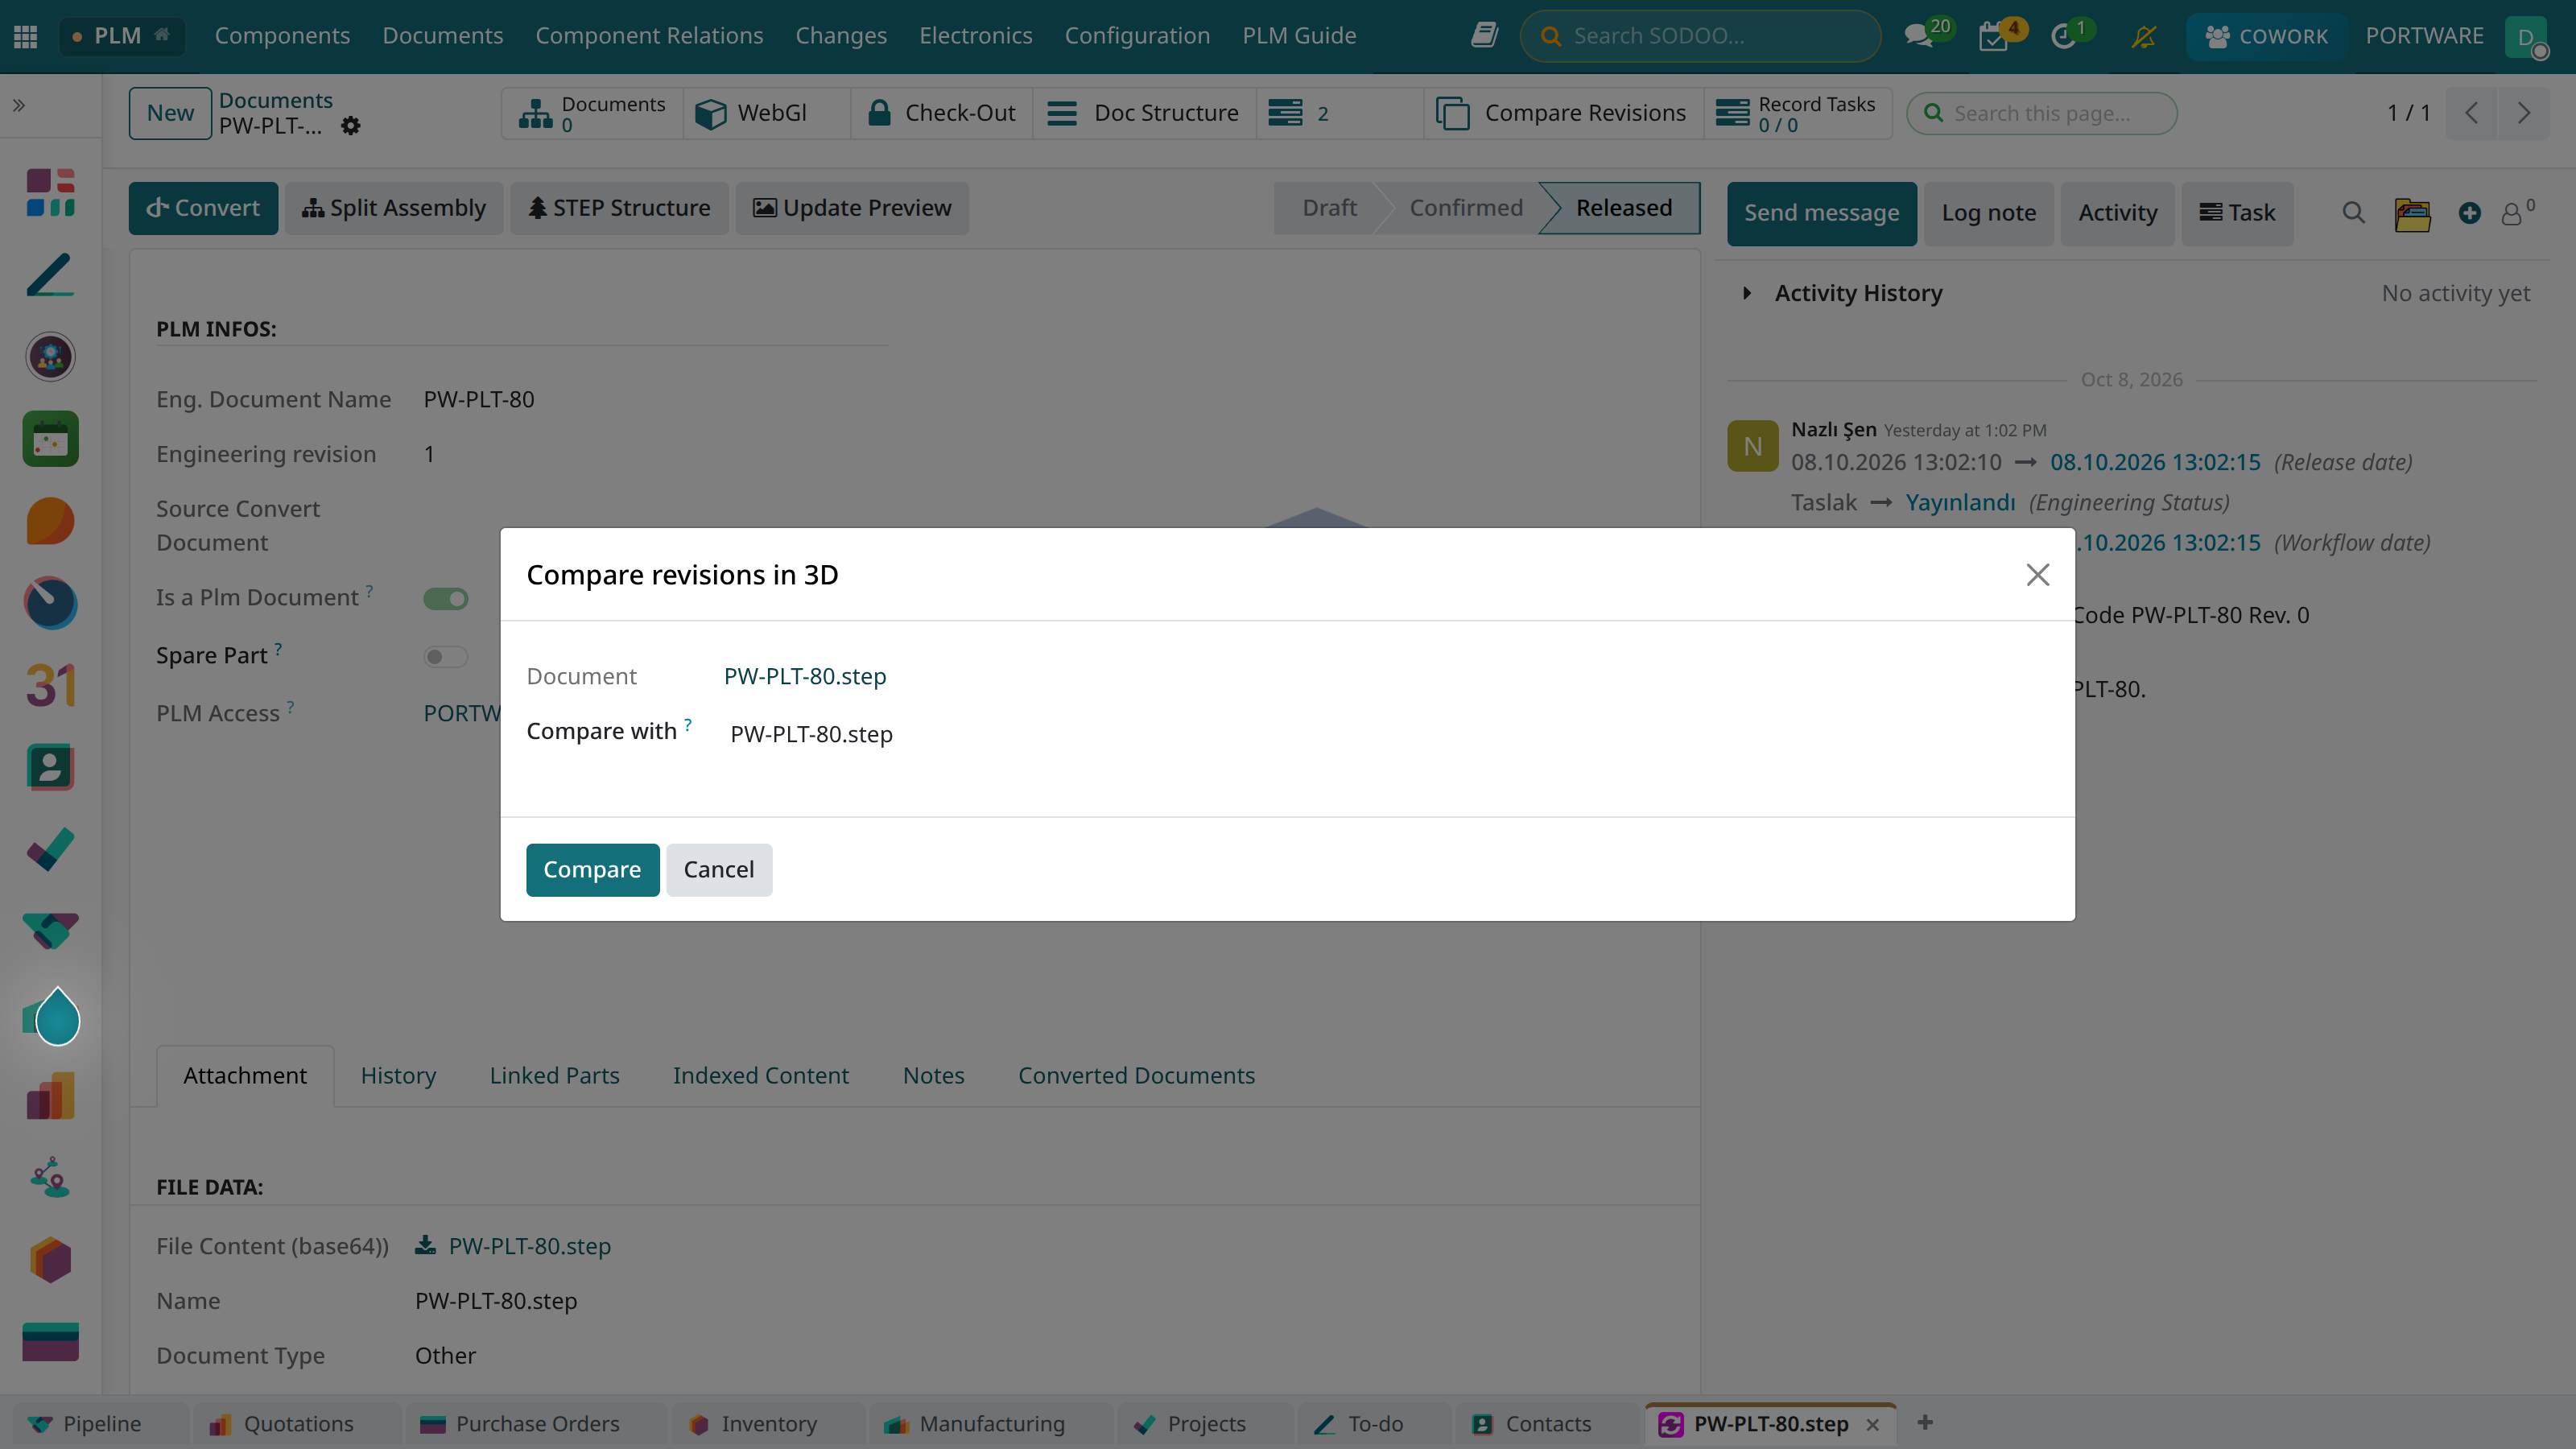
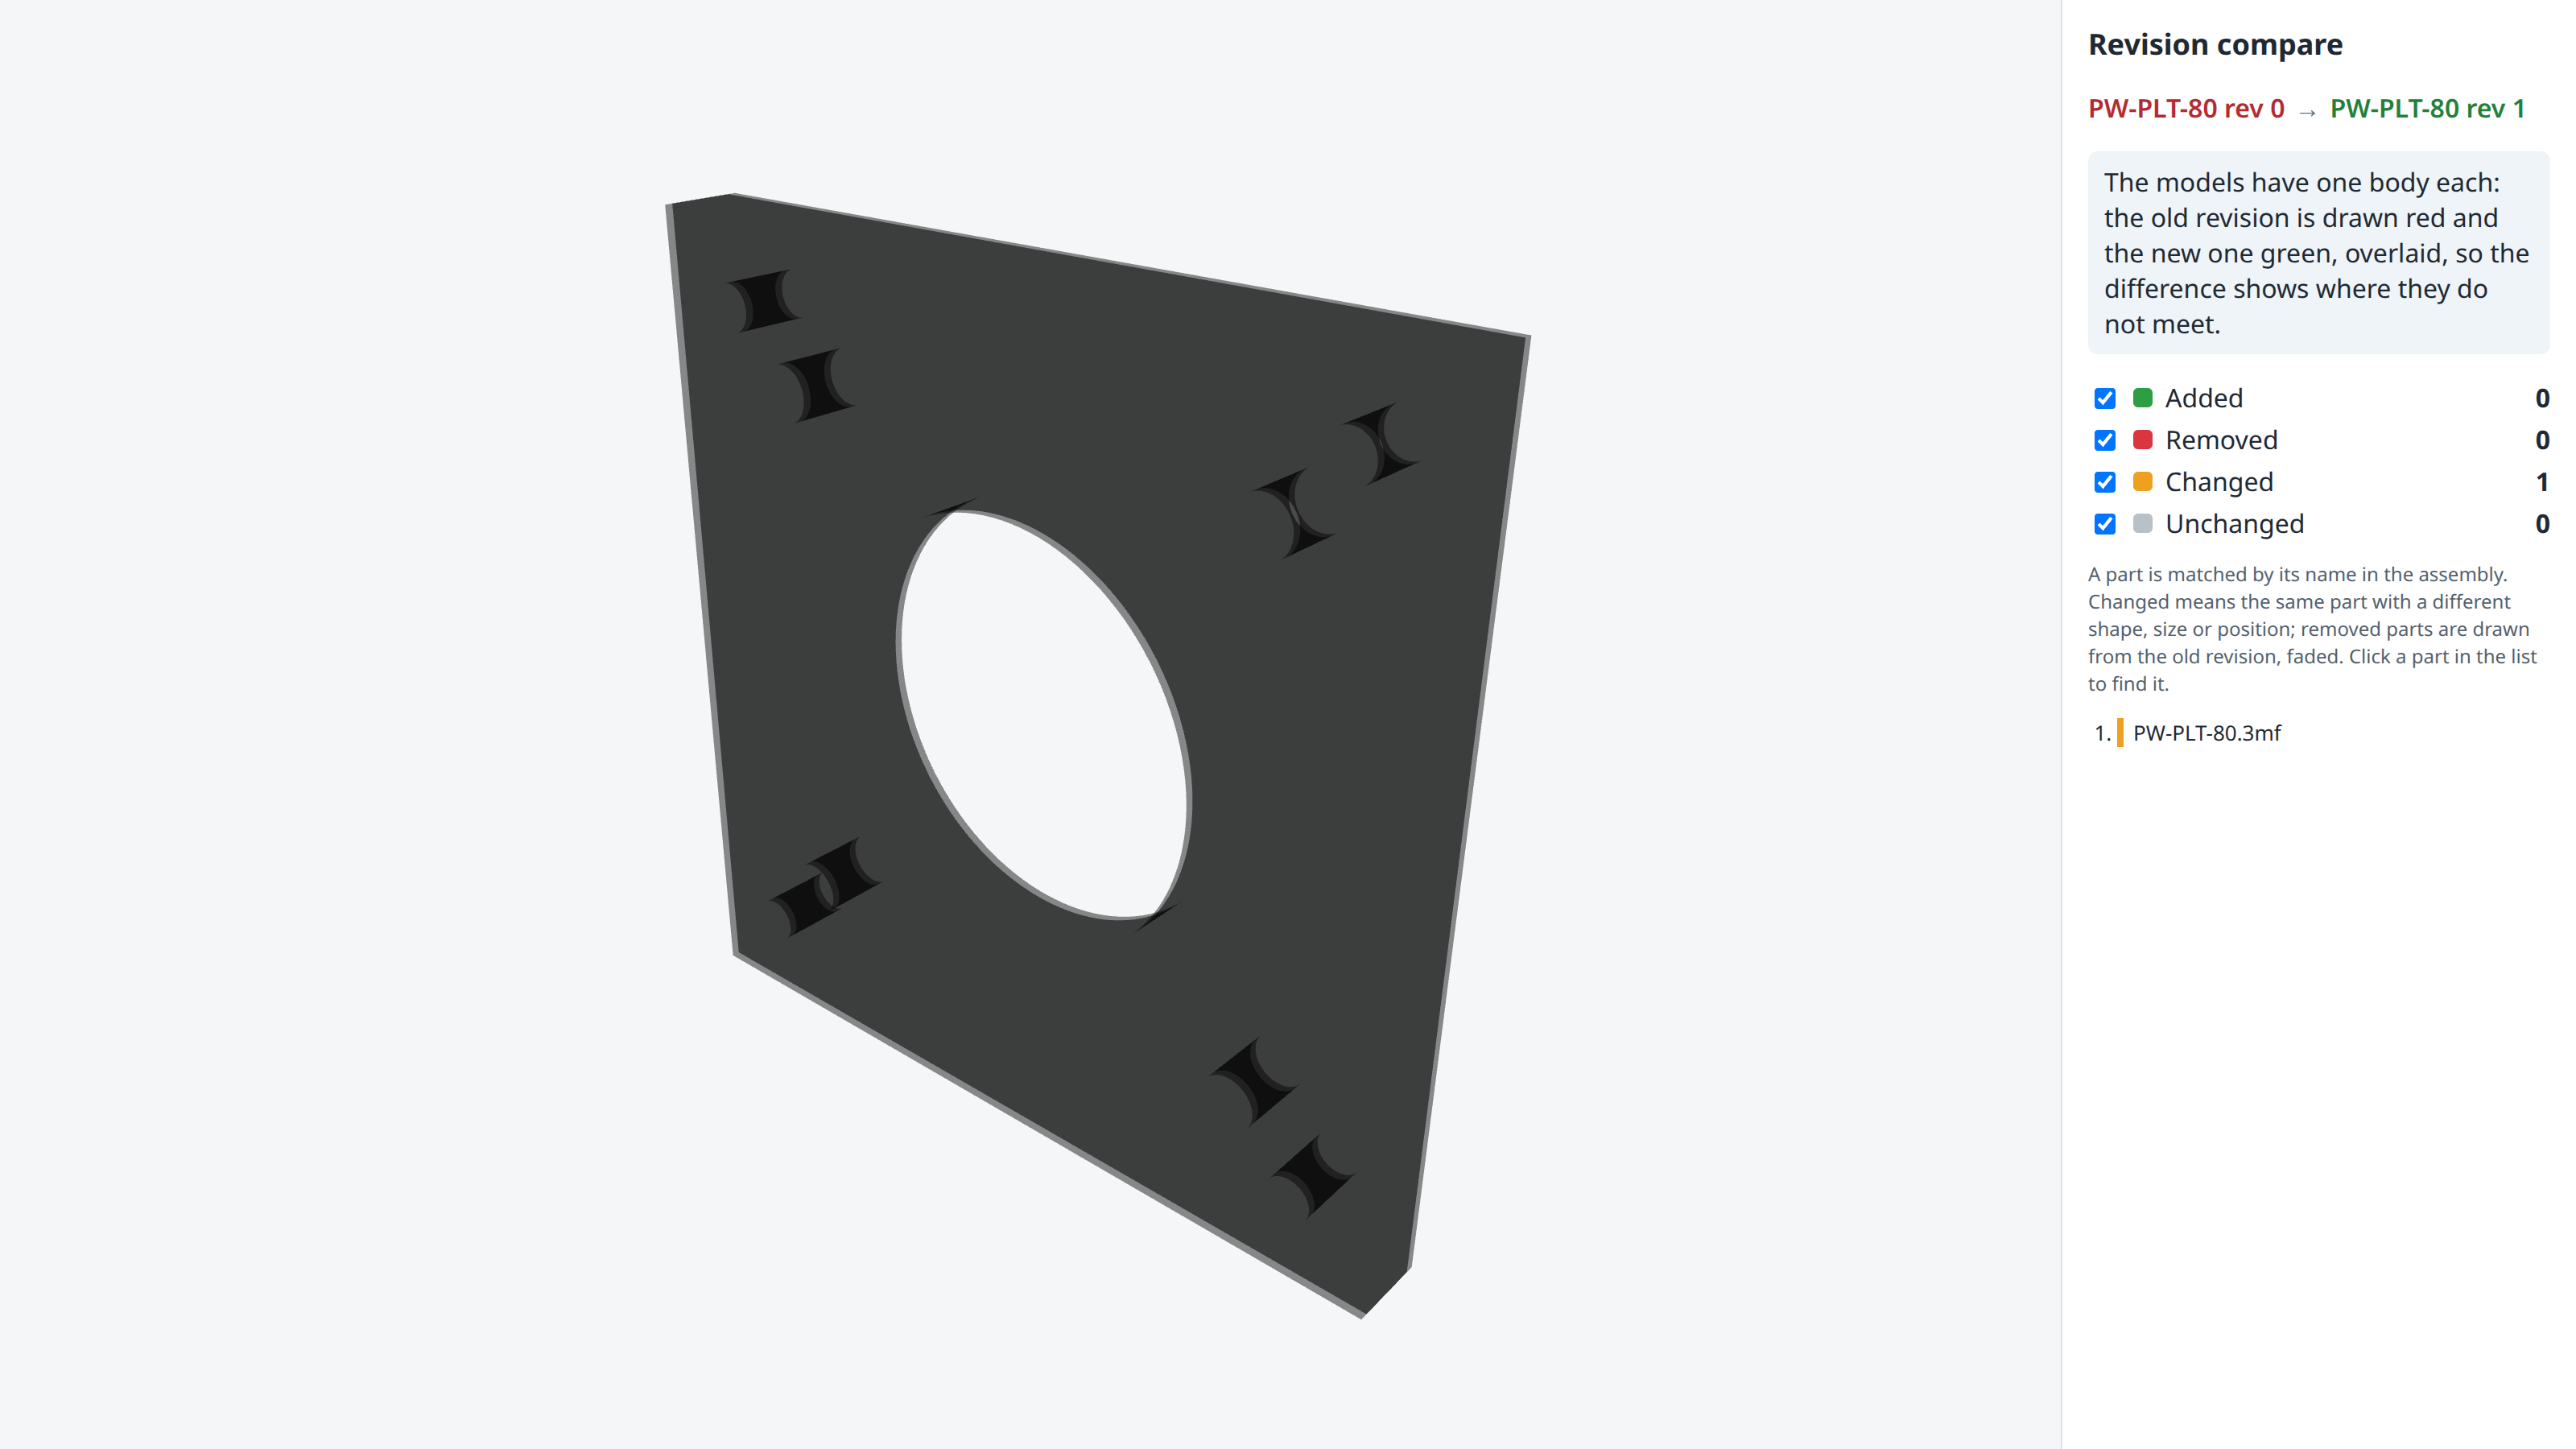
When another revision of the same document exists, the document form shows Compare Revisions. The wizard proposes the previous revision; Compare opens both revisions in 3D and colours the parts added, removed and changed. For single-body models the old revision is drawn red and the new one green, overlaid: the difference shows where they do not meet.
 123
123- The document open: the plate's rev 1 STEP model.
- The revision to compare with (the previous one is proposed).
- Compare: opens the comparison in a new tab.
 1234
1234- The revisions compared: rev 0 → rev 1.
- Colours and counts: added, removed, changed, unchanged; the boxes hide and show them.
- The result sentence.
- The model: 8 mm (red) and 10 mm (green) overlaid.
Electronic design (ECAD)
Electronic boards live in the same PLM: the Electronics menu holds Electronic components, the Approved manufacturer list, ECAD documents and Import electronic BOM. An electronic part goes through code, revision, life cycle and change exactly like a mechanical one.
The CAD client: setup step by step
- Install the OdooPLM CAD client (OmniaSolutions; distributed at sourceforge.net/projects/openerpplm) on the CAD workstation.
- Connect it with this server's address (the one in your browser), the database name and your own login. Everything the client does is done with your PLM rights.
- Saving from CAD needs the PLM Integration User level; ask your PLM administrator.
- From inside the CAD program check the document out, work, save, and check it in when done. Saving creates or updates the part, the document and the engineering BoM.
Mini case: the bracket model is with Kerem
- Situation
- PW-BRK-80.step rev 1 is checked out by Kerem Tunç on workstation CAD-WS-03.
- Meaning
- Kerem is making the gusset 10 mm; nobody can write over the model.
- Next step
- Once Kerem saves and checks in, the change order can go to review.