Lesson 1 · A tour of the screens
The PLM menu, the part list, the part form, the blue guide box, the counters and the PLM Guide.
Goal of this lessonTo move around the PLM screens without getting lost: the menu, the part list, the part form and the PLM Guide.
The PLM menu
Open the PLM app from the app menu. The top bar holds seven menus, each leading to one kind of data. The map below is drawn from this database's real menu.
Step by step
Read the part list
The Components menu lists the engineering parts. The default Latest filter hides obsolete and under-modify revisions: the list keeps the version of each part in use today.
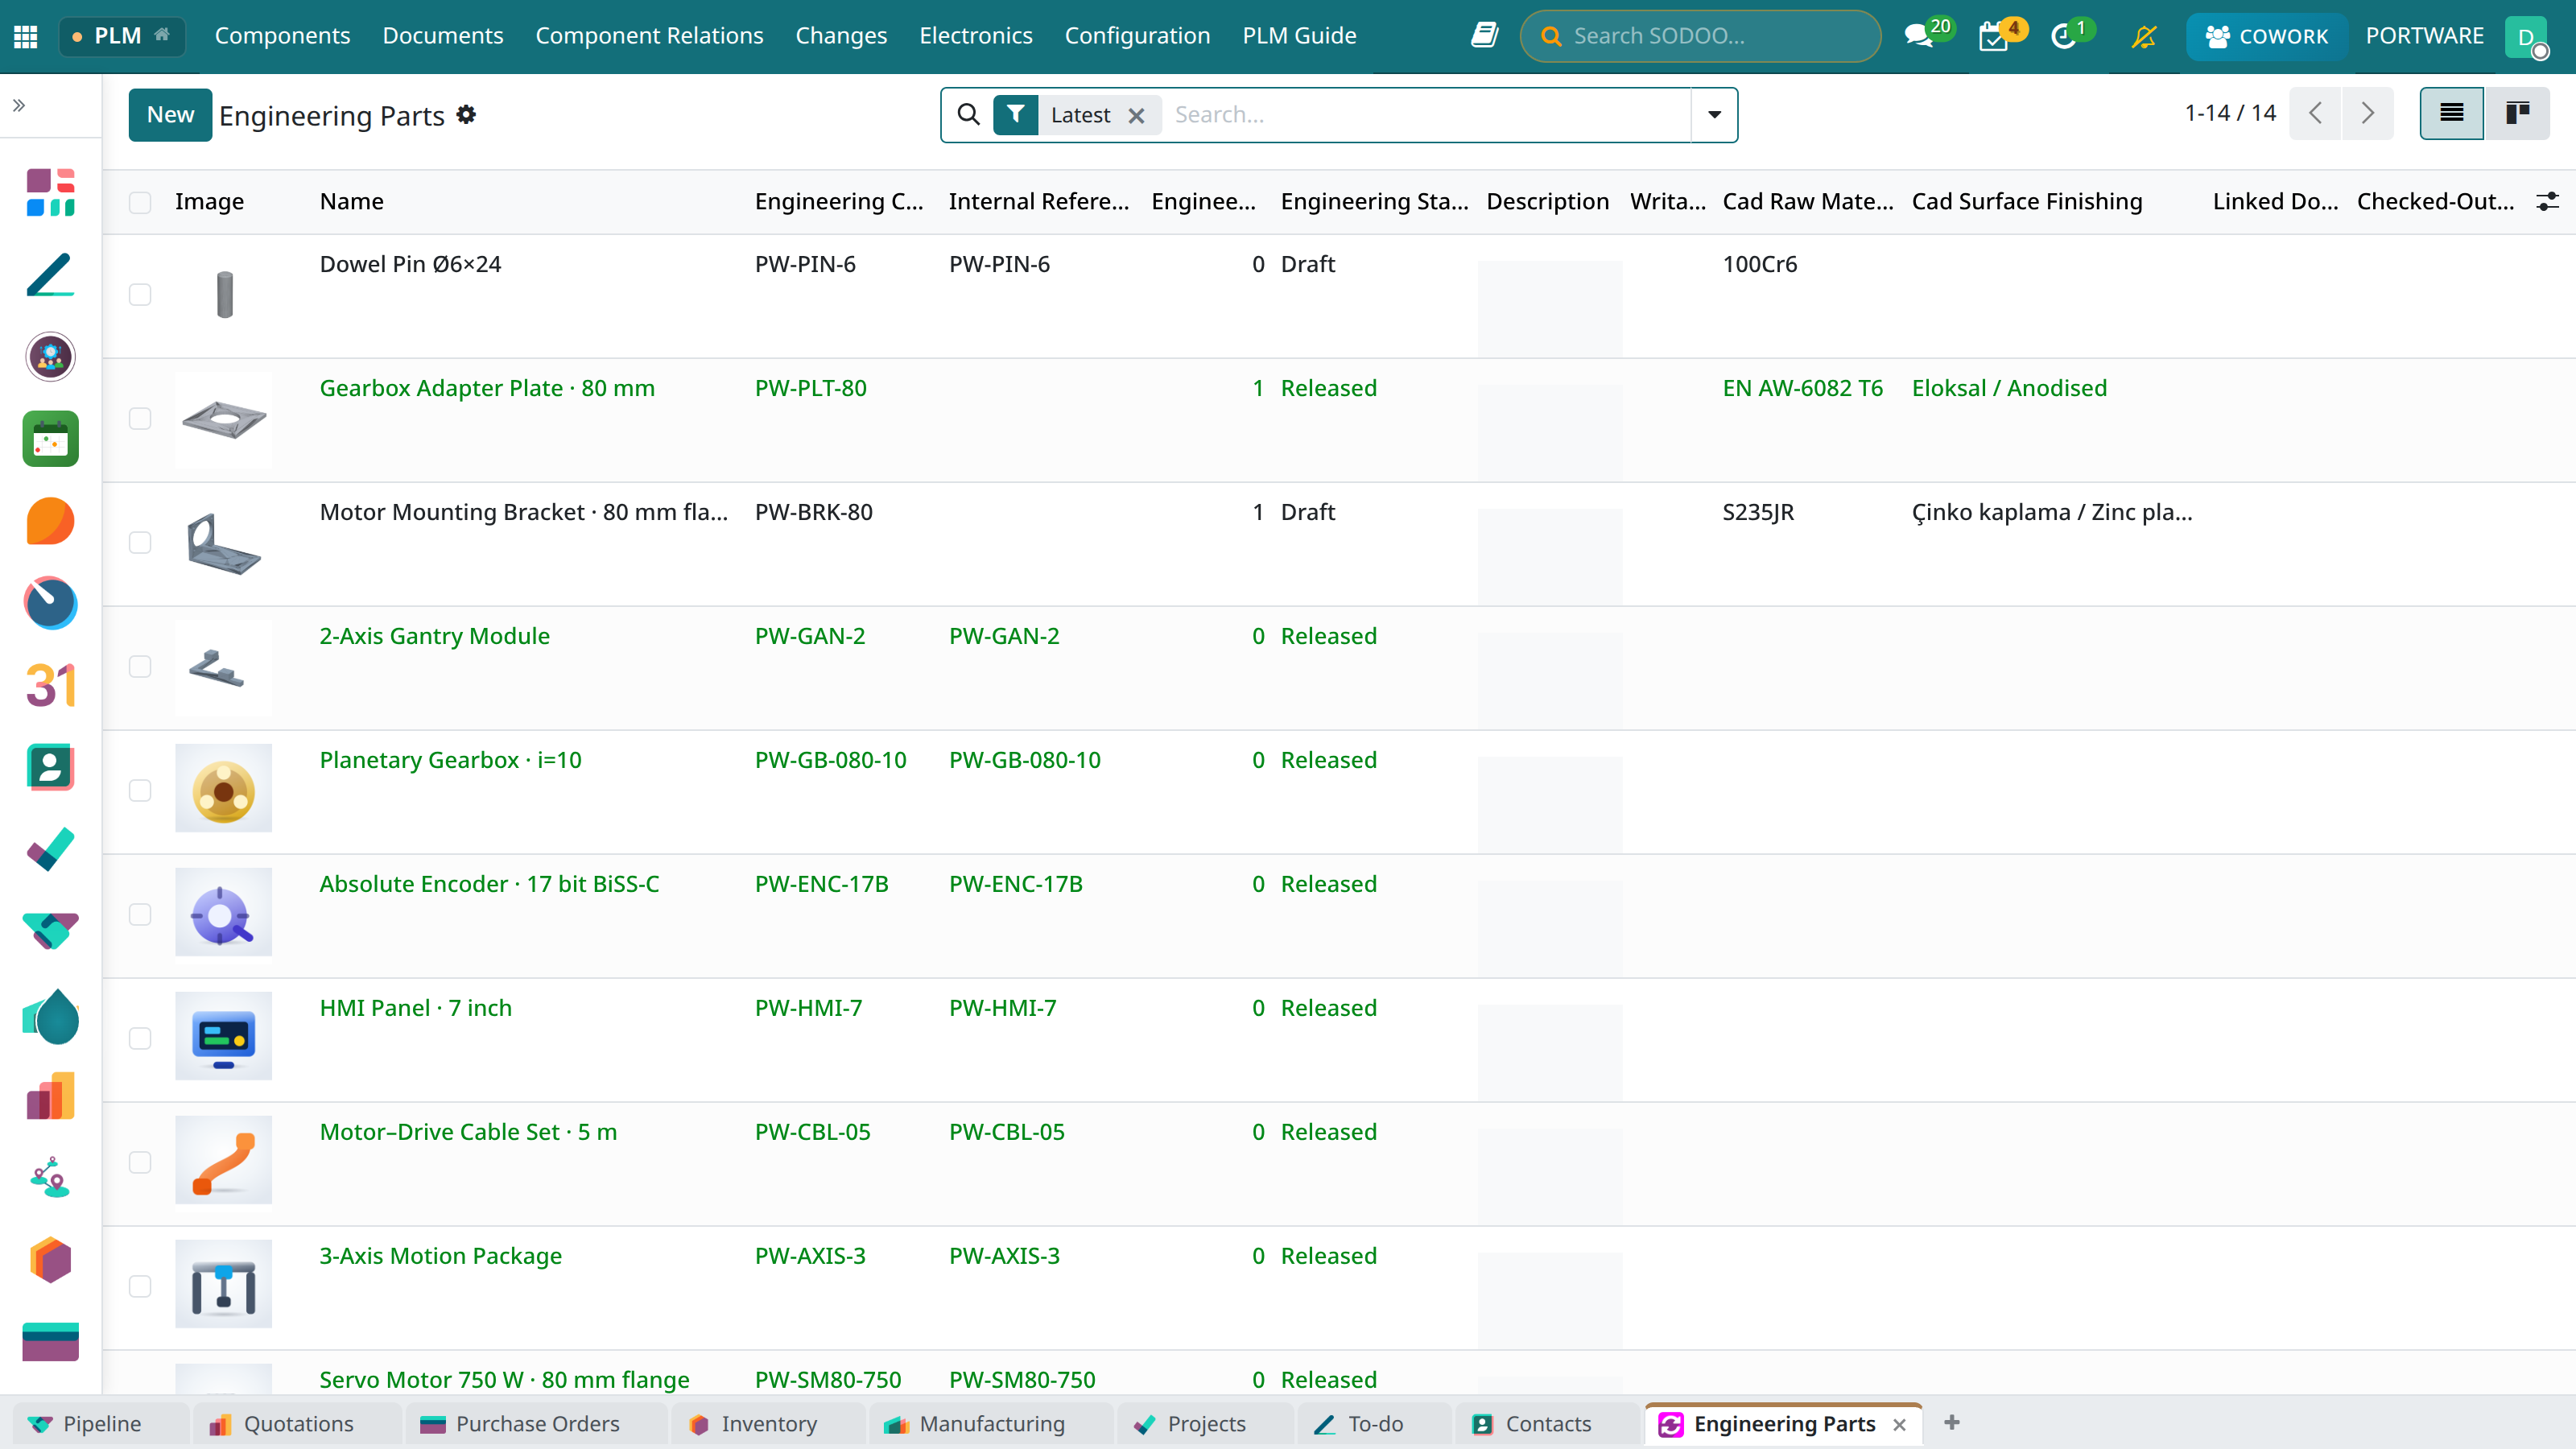 12345
12345- The PLM menus: Components, Documents, Component Relations, Changes, Electronics, Configuration, PLM Guide.
- The part number (engineering code) column.
- Engineering state: the colour tells the state (green Released, blue Confirmed, black Draft).
- The Latest filter: hides obsolete and under-modify revisions.
- View switcher: list and kanban (cards).
Open a part and read the blue box
Every part form has a blue guide box at the top. It says which state the part is in, what that state allows and what comes next. The part below is a draft: the box tells you to press Confirm Component once the design is complete.
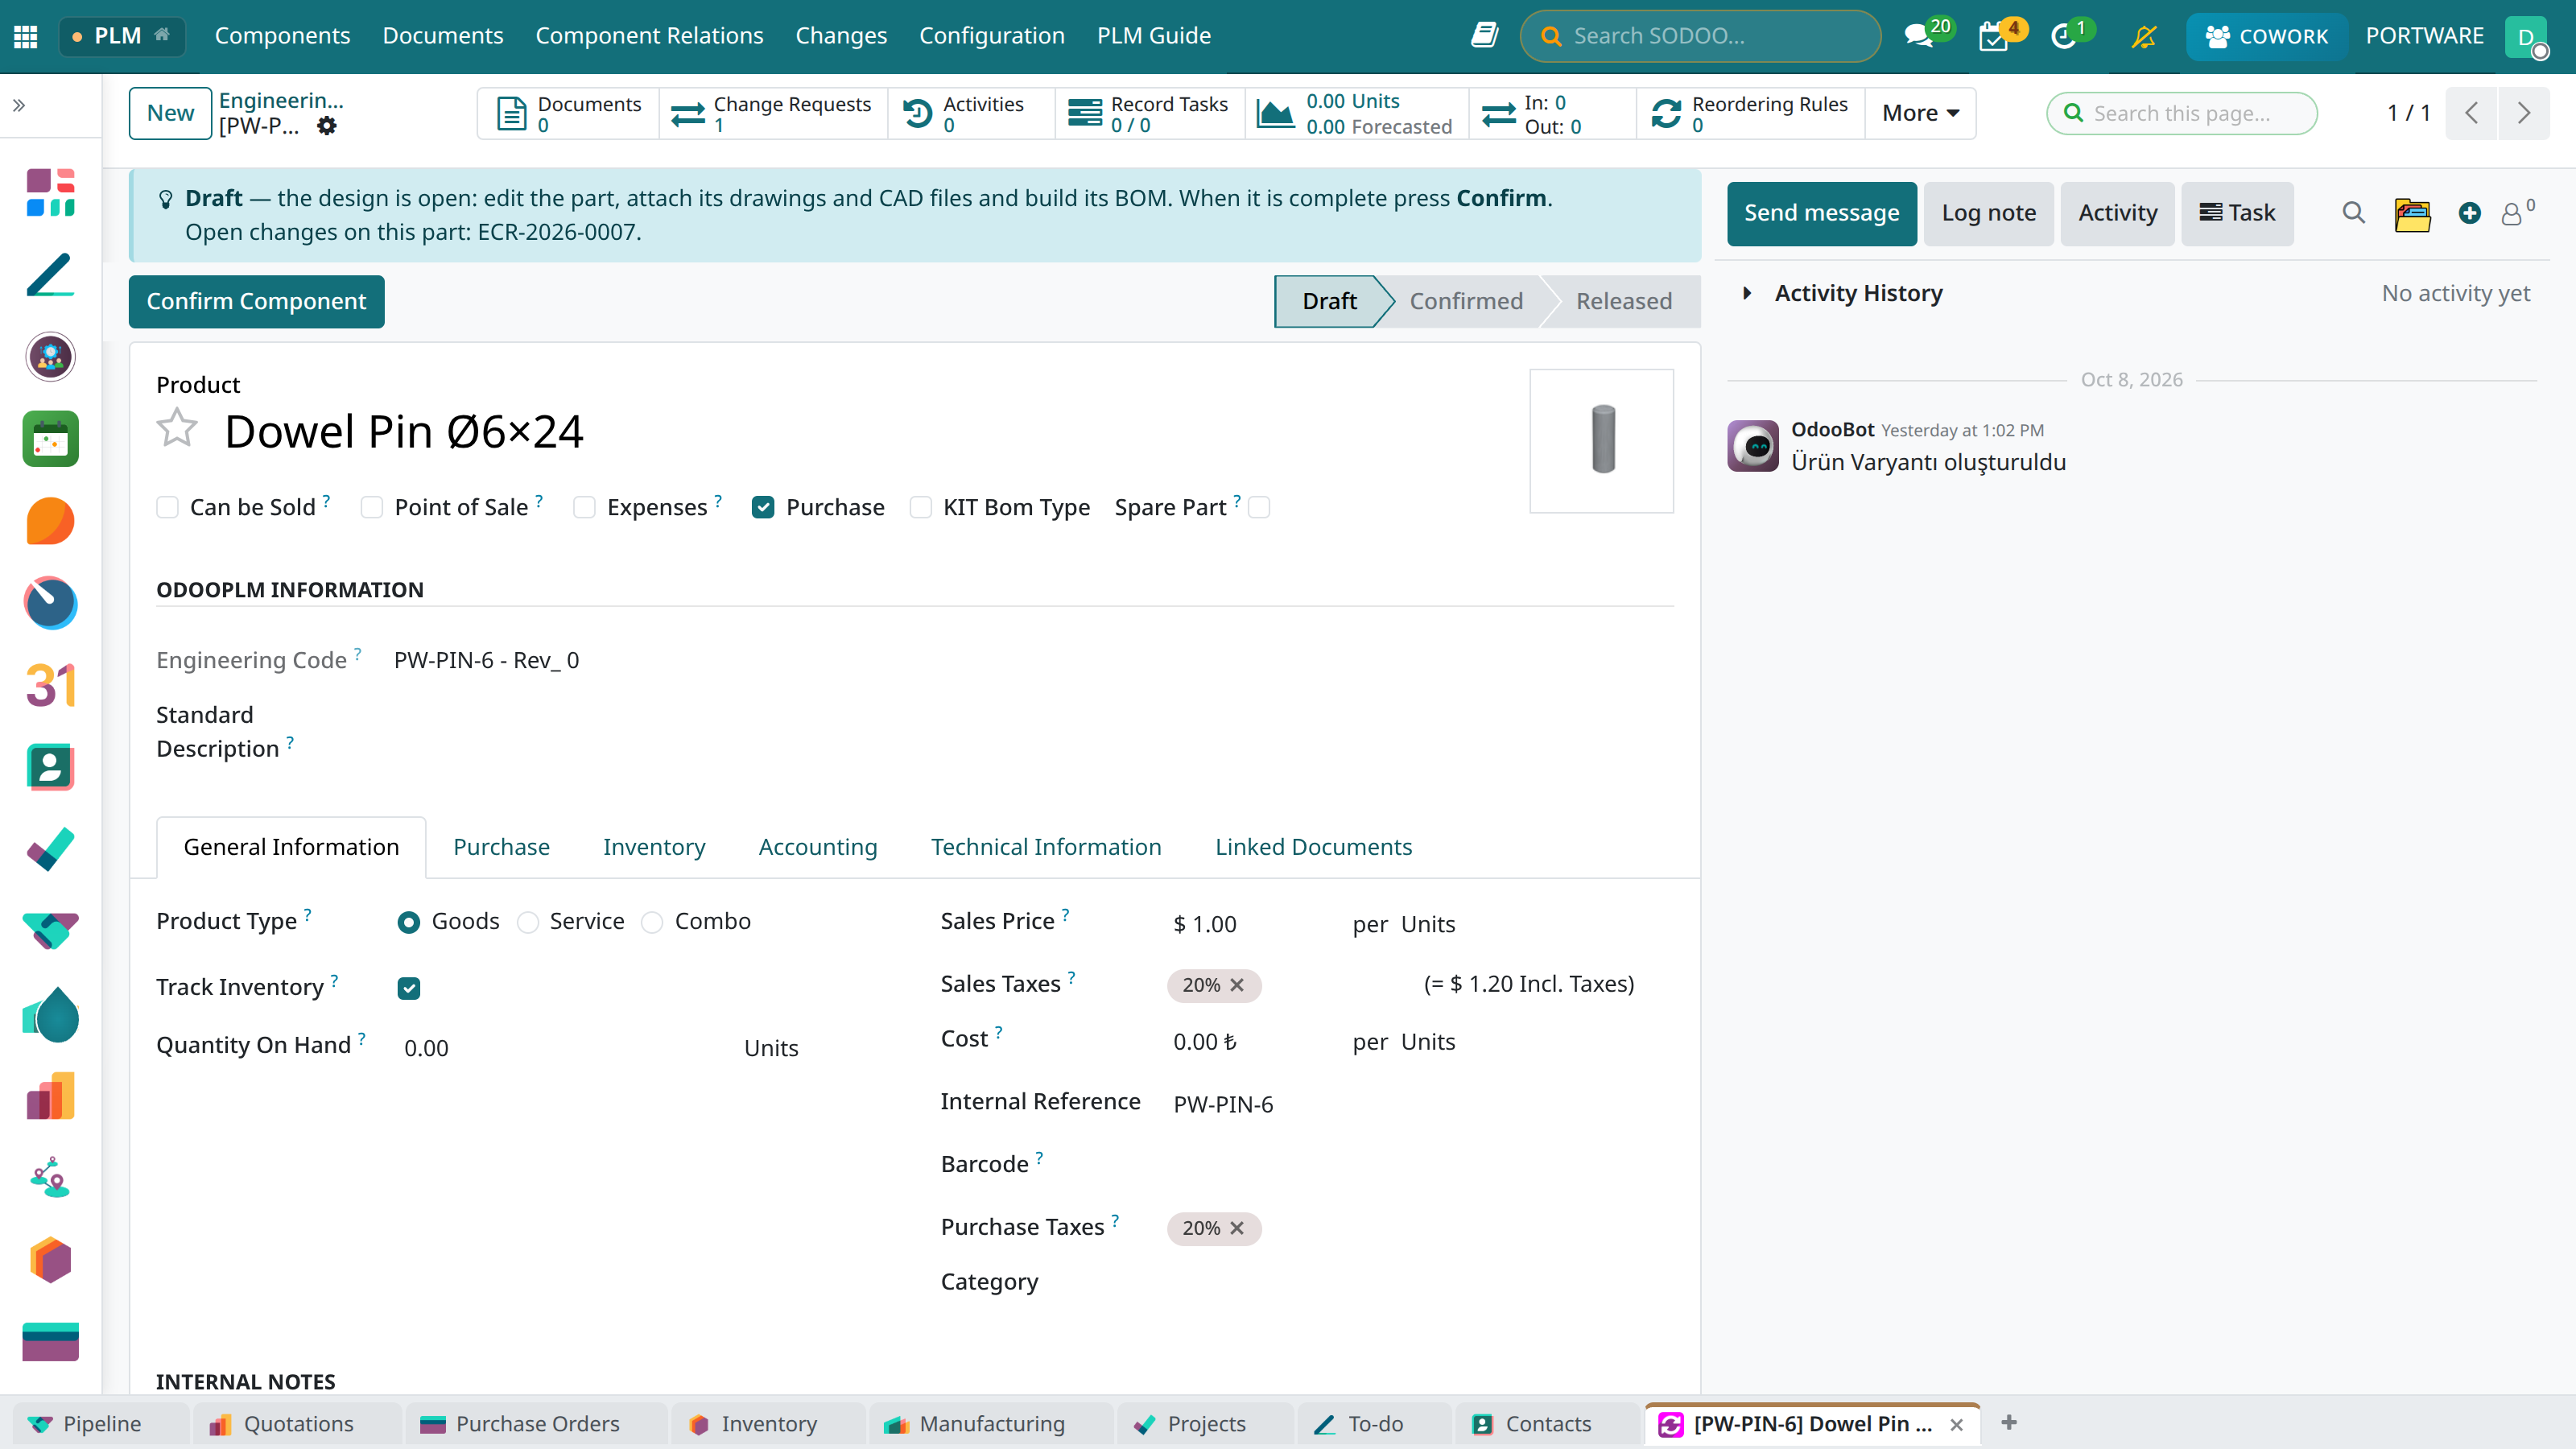 12345
12345- The blue guide box: the state, its meaning and the next step.
- Status bar: Draft → Confirmed → Released.
- Confirm Component: pressed when the design is complete; the part becomes Confirmed.
- Part number and revision.
- Counters (smart buttons): documents, BoMs, change requests and orders; the ones that do not fit are under More.
Open the PLM Guide
The PLM Guide is the short guide inside the app: the words, the life cycle, the change process, the CAD tools, Cowork and good practice. It uses the same words as this course and is the quickest place to look something up at the screen.
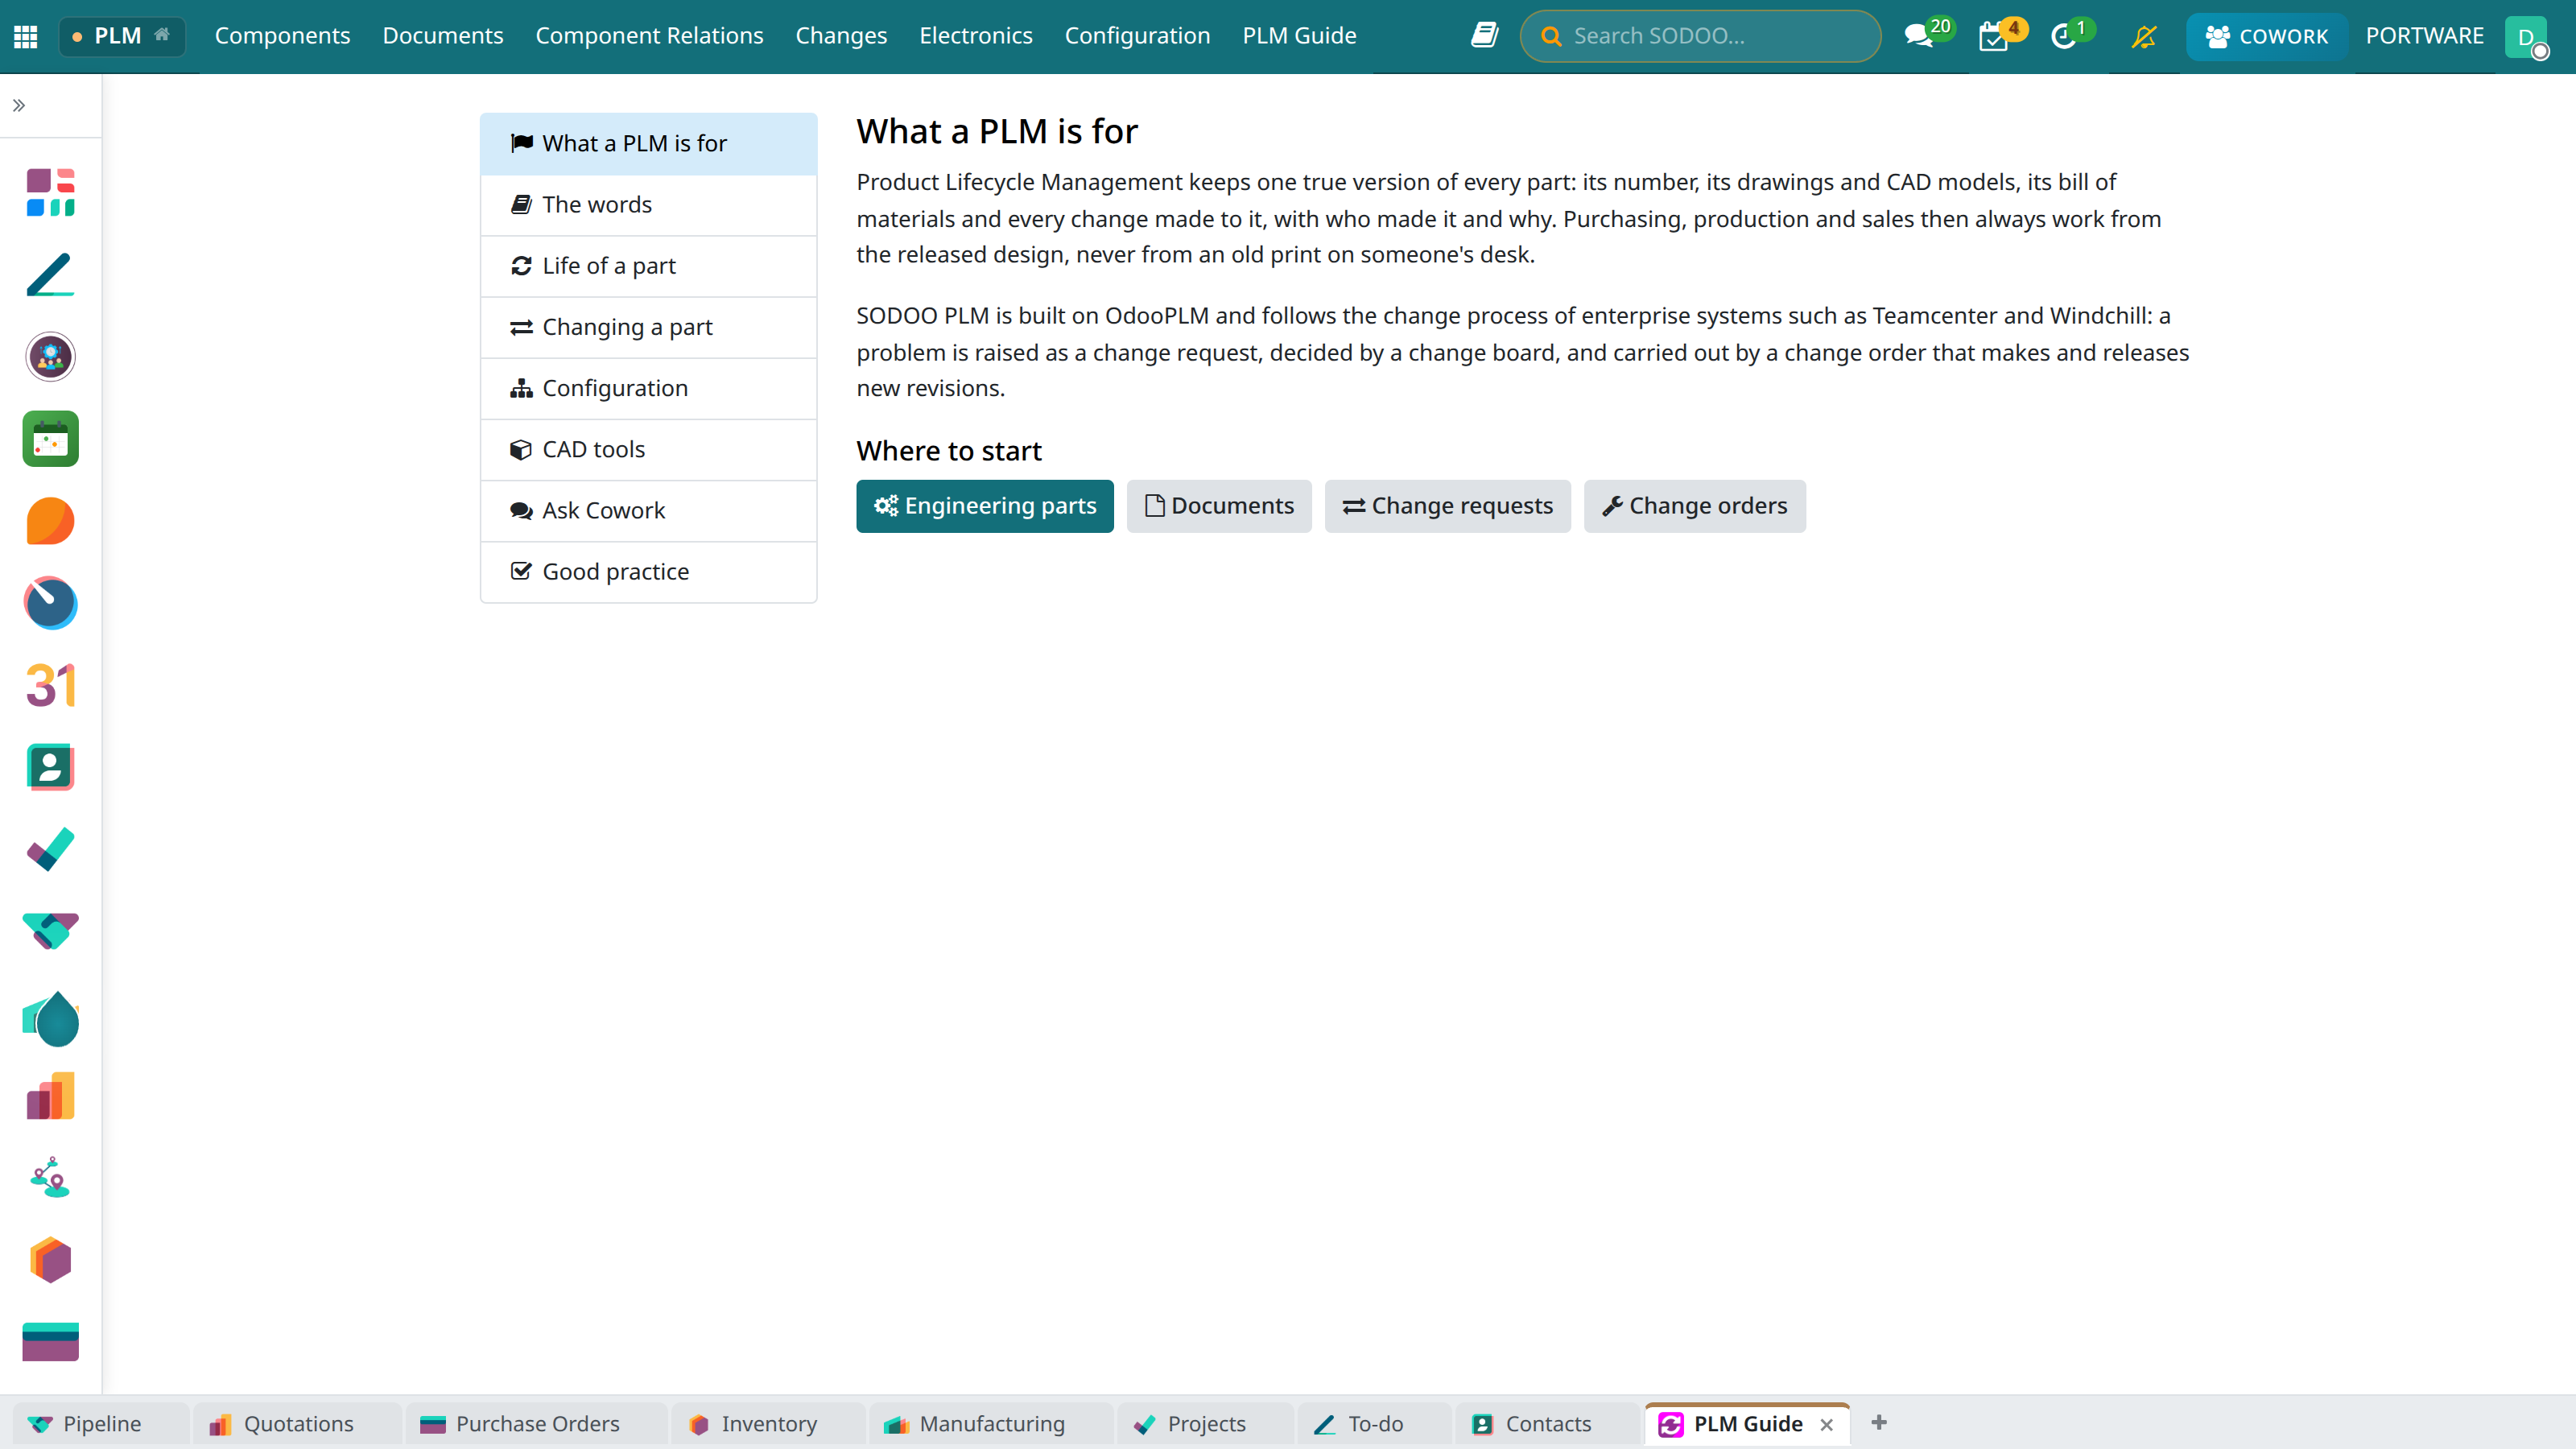 123
123- Sections: What a PLM is for, The words, Life of a part, Changing a part, CAD tools, Ask Cowork, Good practice.
- The chosen section's text.
- Where to start: straight to parts, documents, requests and orders.
Mini case: the first day
- Who
- Elif Aydın, quality engineer, opening the PLM for the first time.
- Question
- “What state is the PW-BRK-80 bracket in, and who is working on it?”
- Path
- Components → open the bracket → blue box: Under Modify, open changes ECR-2026-0002 and ECO-2026-0001.